

17Feb
How to Double-Height Text with ESP32 and MD_Parola
Scrolling text displays are a fantastic way to add dynamic information to your projects. Taking it a step further, double-height text can create a more impactful and readable display. This blog post will guide you through the process of implementing double-height text scrolling on an ESP32 using the MD_Parola library and MAX7219-based matrix displays.
What You’ll Need:
- ESP32 Development Board
- Double-Height Matrix Display (made up of multiple 8×8 MAX7219 modules)
- Connecting Wires
- Power Supply
- Resistors (if required by your display)
- Breadboard (optional)
- Soldering Iron and Solder (optional, for permanent connections)
Hardware Setup:
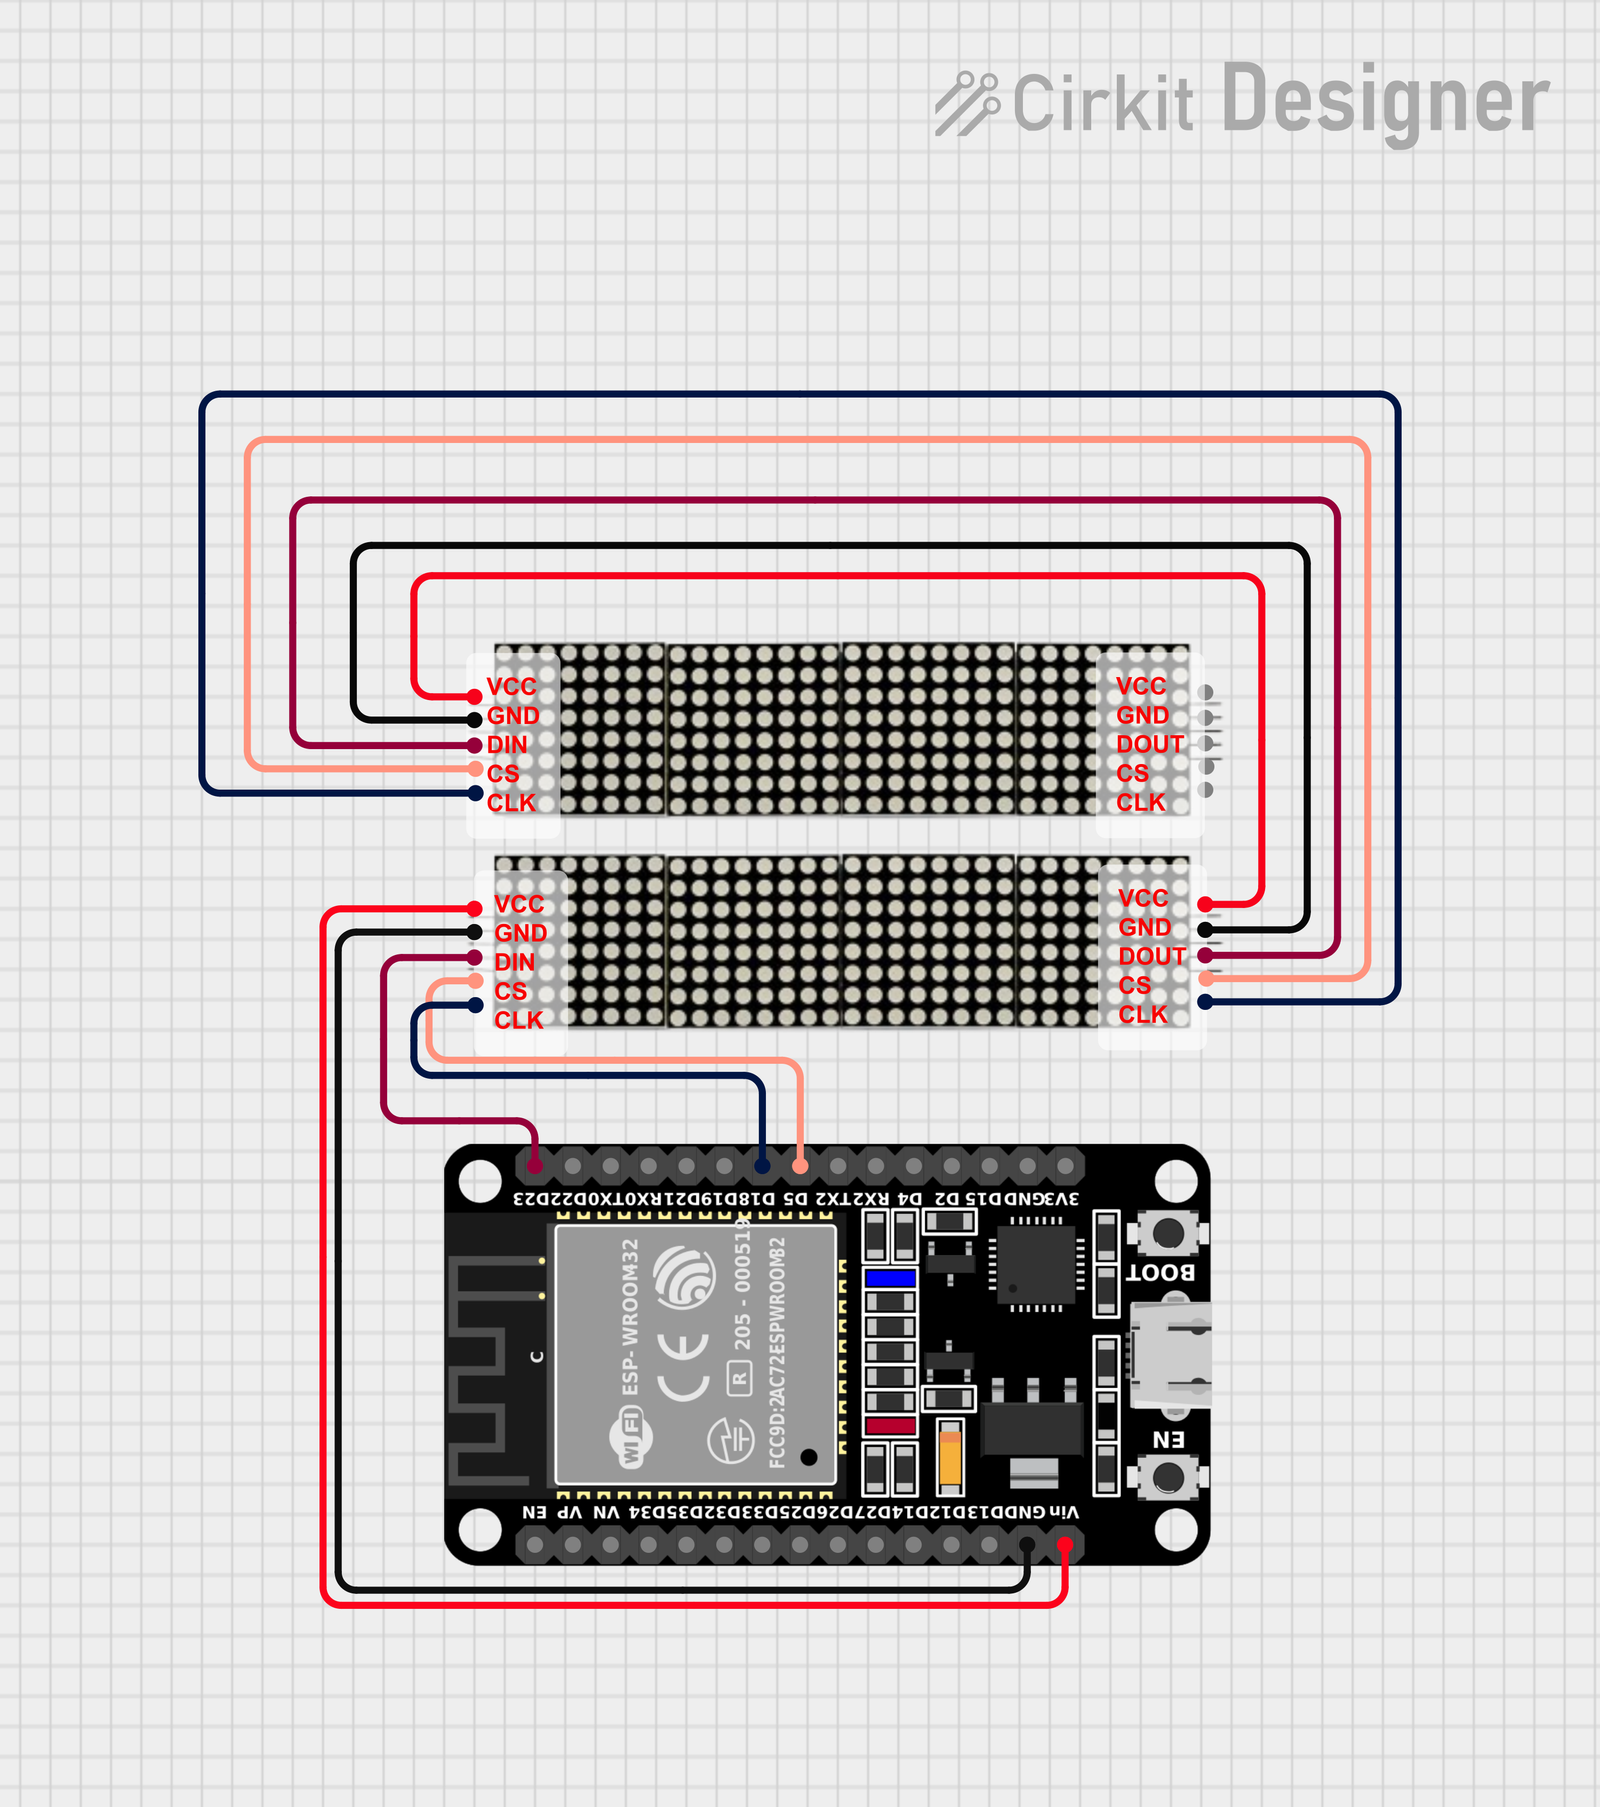
- Identify Connections: Locate the VCC, GND, DIN, CS, and CLK pins on your matrix display modules.
- Wire the Display: Connect the display modules to the ESP32. Pay close attention to the wiring, especially if you have multiple modules. Daisy-chain the (data) line from one module to the next. Connect all CLK and CS lines together (or use individual CS lines if needed). Here’s a general example:
- Display VCC -> ESP32 3.3V
- Display GND -> ESP32 GND
- Display DIN -> ESP32 GPIO 23
- Display CLK -> ESP32 GPIO 18
- Display CS -> ESP32 GPIO 5
- Power the Setup: Connect the power supply to both the ESP32 and the display modules, ensuring correct voltage and current.
Software Setup:
- Install Libraries: Install the MD_Parola, MD_MAX72xx, and SPI libraries through the Arduino Library Manager. You’ll also need a font file (e.g.,
Font_Data.h) for the double-height characters. A font calledBigFontis commonly used. - The Code:
C++
#include <MD_Parola.h>
#include <MD_MAX72xx.h>
#include <SPI.h>
#include "Font_Data.h" // Make sure this is in your sketch folder

#define HARDWARE_TYPE MD_MAX72XX::FC16_HW // Or adjust if not using FC16 modules
#define NUM_ZONES 2 // Upper and lower zones
#define ZONE_SIZE 2 // Modules per zone (adjust if different)
#define MAX_DEVICES 4 // Total number of modules (adjust to match your display)

#define ZONE_UPPER 1
#define ZONE_LOWER 0

#define PAUSE_TIME 0
#define SCROLL_SPEED 50

#define CLK_PIN 18
#define DATA_PIN 23
#define CS_PIN 5

MD_Parola P = MD_Parola(HARDWARE_TYPE, DATA_PIN, CLK_PIN, CS_PIN, MAX_DEVICES);

const char *msgL[] = {"MakerSpaceKanpur"}; // Text for the lower zone
char *msgH; // Text for the upper zone

void setup() {
  Serial.begin(115200);
  int max = 0;
  for (int i = 0; i < ARRAY_SIZE(msgL); i++) {
    if (strlen(msgL[i]) > max) max = strlen(msgL[i]);
  }
  msgH = (char *)malloc(sizeof(char) * (max + 2)); // Allocate memory
  P.begin(NUM_ZONES);
  P.setZone(ZONE_LOWER, 0, ZONE_SIZE - 1);
  P.setZone(ZONE_UPPER, ZONE_SIZE, MAX_DEVICES - 1);
  P.setFont(BigFont); // Use the double-height font
  P.setCharSpacing(P.getCharSpacing() * 2);

  P.setZoneEffect(ZONE_UPPER, true, PA_FLIP_UD); // Flip upper zone (adjust as needed)
  P.setZoneEffect(ZONE_UPPER, true, PA_FLIP_LR); // Flip upper zone (adjust as needed)
}

void createHString(char *pH, const char *pL) {
  for (; *pL != '\0'; pL++) {
    *pH++ = *pL | 0x80; // Crucial for double-height characters
  }
  *pH = '\0';
}

void loop() {
  static uint8_t cycle = 0;
  P.displayAnimate();

  if (P.getZoneStatus(ZONE_LOWER) && P.getZoneStatus(ZONE_UPPER)) {
    createHString(msgH, msgL[cycle]); // Create the upper zone string
    P.displayClear();
    P.displayZoneText(ZONE_LOWER, msgL[cycle], PA_LEFT, SCROLL_SPEED, PAUSE_TIME, PA_SCROLL_LEFT, PA_SCROLL_LEFT);
    P.displayZoneText(ZONE_UPPER, msgH, PA_LEFT, SCROLL_SPEED, PAUSE_TIME, PA_SCROLL_RIGHT, PA_SCROLL_RIGHT);
    cycle = (cycle + 1) % ARRAY_SIZE(msgL);
    P.synchZoneStart();
  }
}
This blog post and the provided code should provide a solid foundation for creating double-height scrolling text displays with your ESP32 and MD_Parola. Remember to carefully adapt the code to your specific hardware setup. The correct configuration of MAX_DEVICES, ZONE_SIZE, and NUM_ZONES is absolutely crucial.


Leave a Reply
You must be logged in to post a comment.