

Controlling Servo Motors with ESP32: A Beginner’s Guide
Introduction
Servo motors are a type of actuator that can be controlled to rotate to a specific angle. They are widely used in robotics, automation, and hobby projects. In this blog post, we’ll explore how to control a servo motor using an ESP32 microcontroller.
What You’ll Need
- ESP32 microcontroller (e.g., ESP32-WROOM-32)
- Servo motor (e.g., SG90)
- Breadboard
- Jumper wires
- 5V power supply
Understanding Servo Motors
Servo motors have three wires:
- Power (V+): Connected to the positive terminal of the power supply.
- Ground (GND): Connected to the negative terminal of the power supply.
- Signal (PWM): Connected to a digital pin on the microcontroller.
Servo motors operate based on pulse-width modulation (PWM). The width of the pulse determines the angle to which the servo rotates. A pulse width of 1ms corresponds to 0 degrees, 2ms corresponds to 90 degrees, and 1.5ms corresponds to 180 degrees.
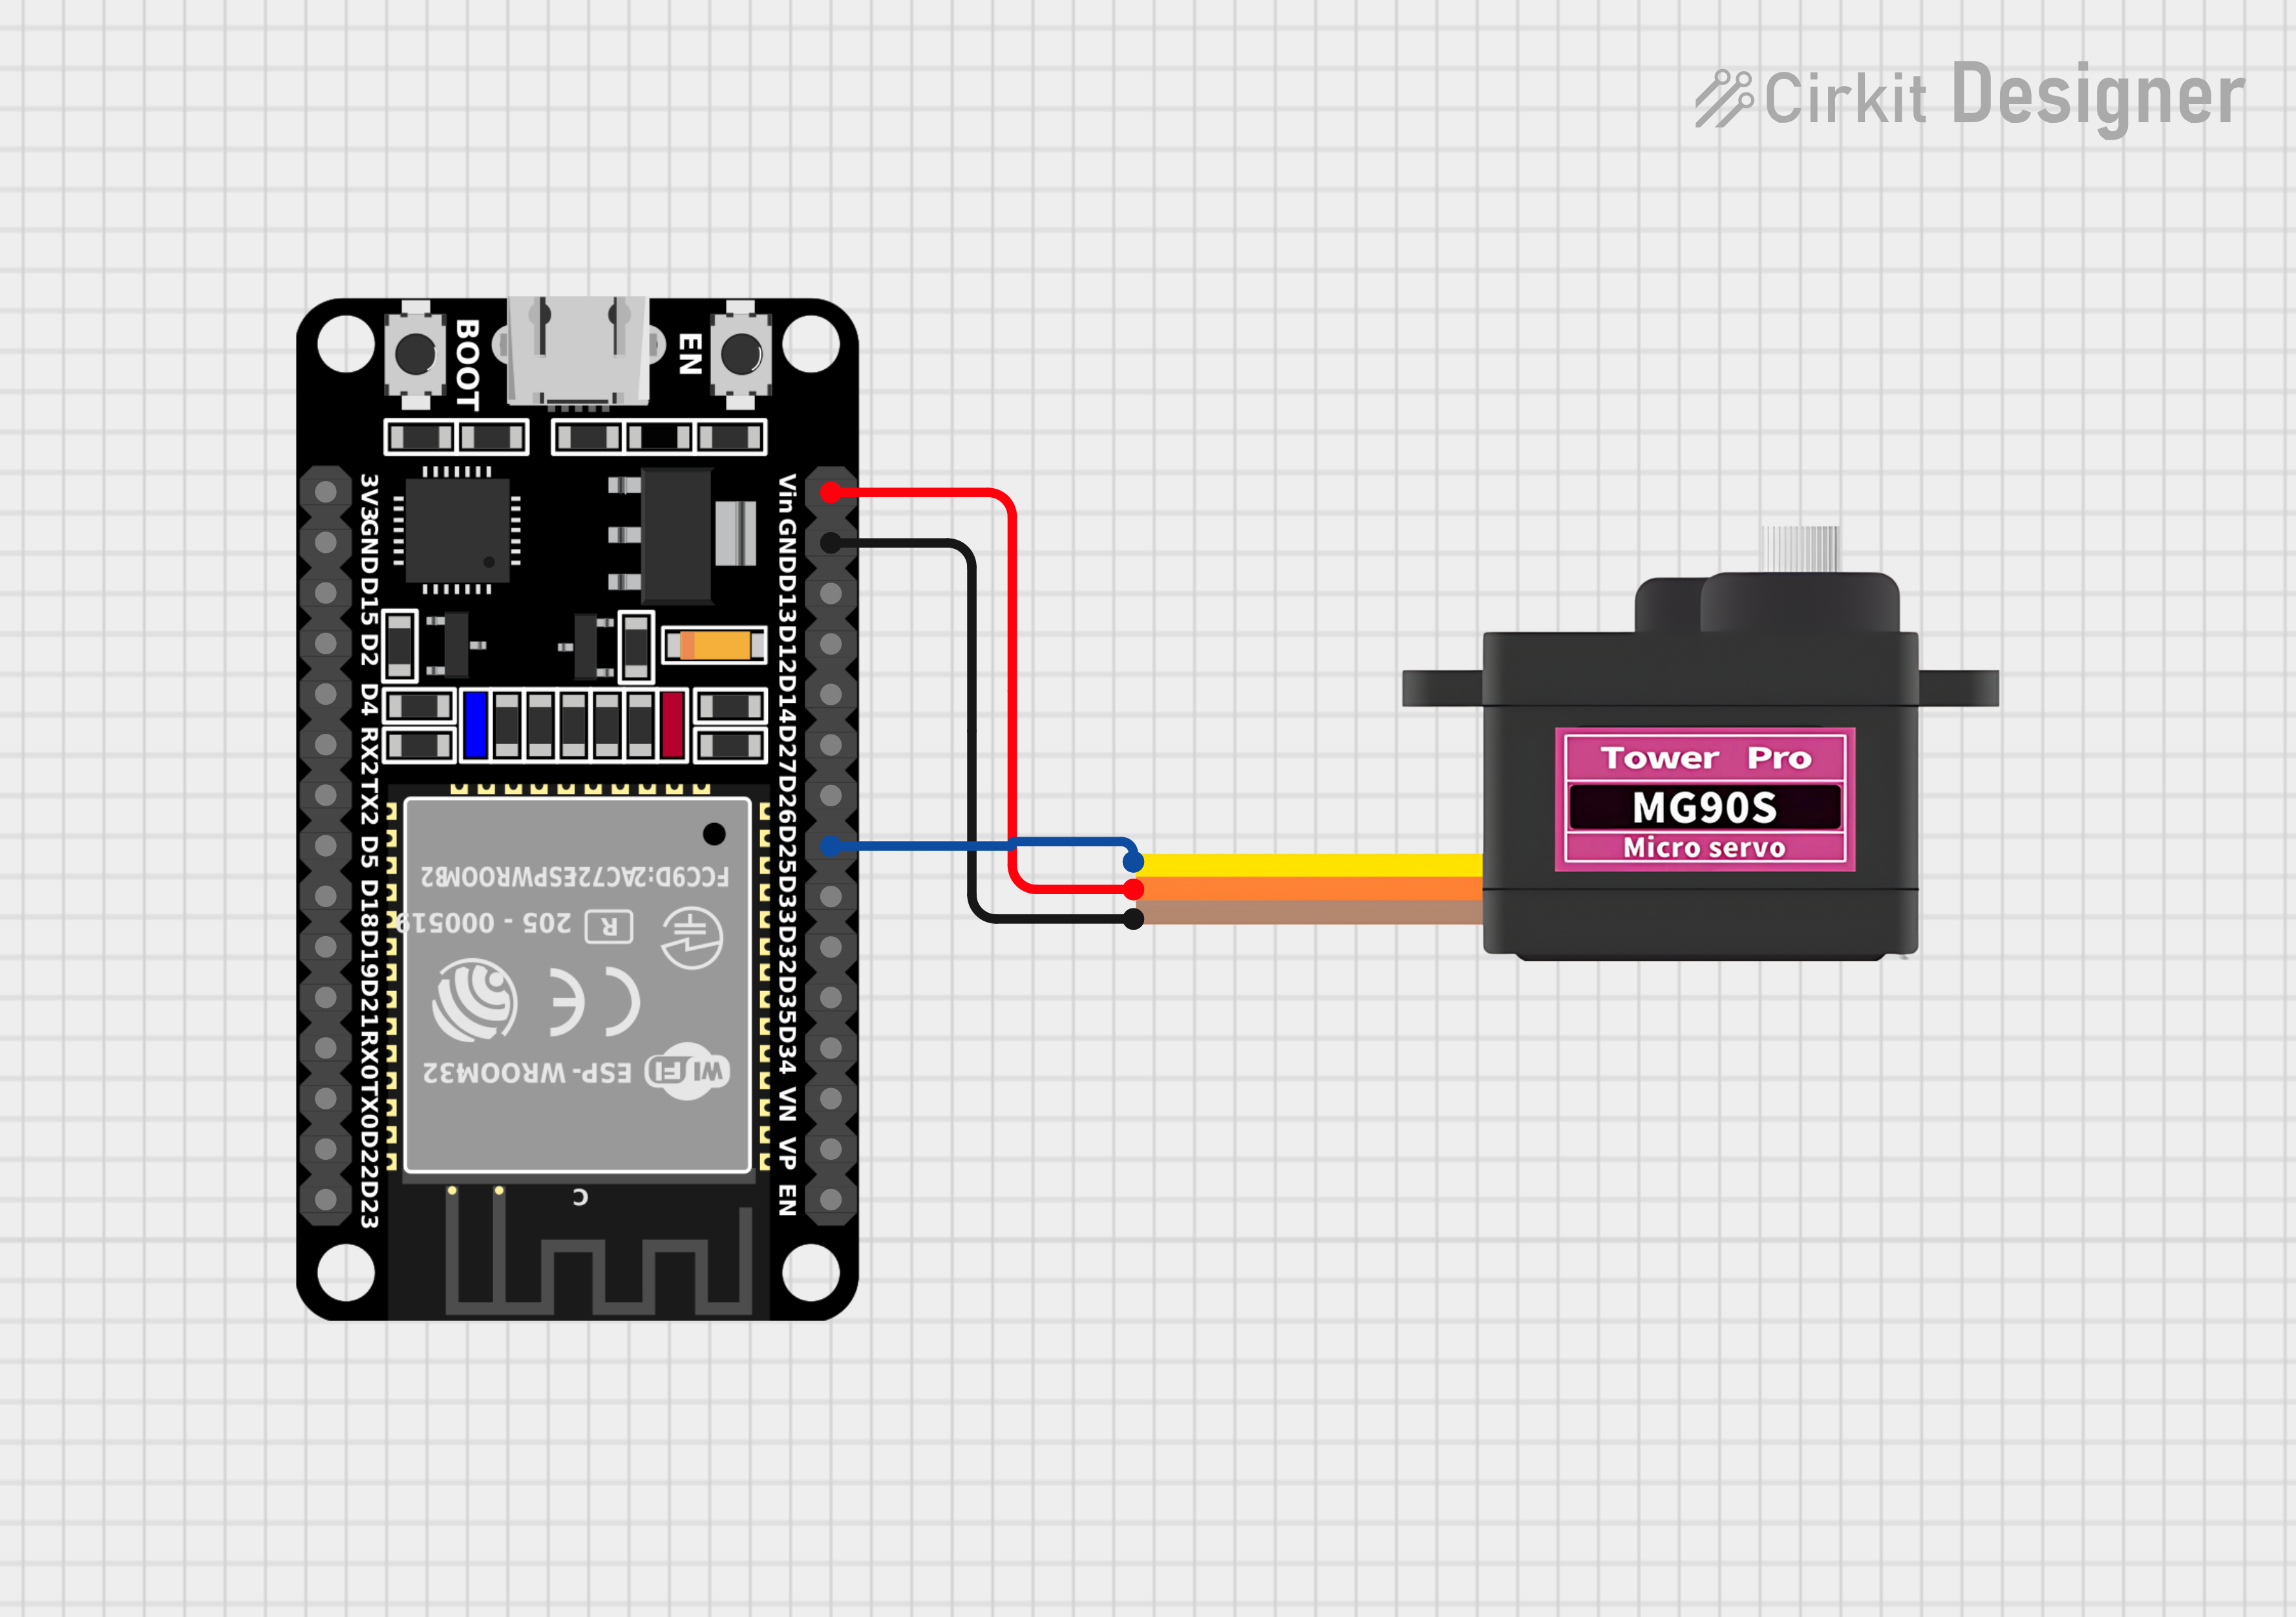
Connecting the Servo to ESP32
- Connect the 5V power supply to the V+ pin of the servo.
- Connect the ground of the power supply to the GND pin of the servo.
- Connect the signal pin of the servo to a digital pin on the ESP32 (e.g., GPIO13).
ESP32 Code
Here’s a basic example of ESP32 code to control a servo motor:
C++
#include <ESP32Servo.h>

Servo myservo;  // create servo object to control a servo

int servoPin = 25;  // GPIO pin connected to the servo signal

void setup() {

  myservo.attach(servoPin);  // attaches the servo on GPIO 18 to the servo object

  }

  void loop() {
    myservo.write(0);  // tell servo to go to position 0
    delay(1000);       // wait 1 second

    myservo.write(90); // tell servo to go to position 90
    delay(1000);       // wait 1 second

    myservo.write(180);// tell servo to go to position 180
    delay(1000);       // wait 1 second
    }
In this code:
#include <Arduino.h>includes the Arduino core library.#define SERVO_PIN 13defines the digital pin connected to the servo.servoWrite(SERVO_PIN, angle)function sets the servo angle to the specified value.
Uploading the Code
- Connect your ESP32 to your computer using a USB cable.
- Open the Arduino IDE and select the correct board and port.
- Upload the code to the ESP32.
Testing the Servo
Once the code is uploaded, you should see the servo motor move between the 0, 90, and 180-degree positions. You can modify the delay times and angles in the code to control the servo’s movement as needed.
Conclusion
Controlling servo motors with an ESP32 is a relatively simple task that can be achieved with basic programming knowledge. By understanding the principles of PWM and the connections between the servo and ESP32, you can create a wide range of projects involving robotic movements and automation.


Leave a Reply
You must be logged in to post a comment.