

ESP32 and 16×2 LCD Display with I2C Module: A Comprehensive Guide
Introduction
The ESP32 is a powerful and versatile microcontroller that has gained immense popularity due to its low cost, high performance, and rich feature set. One of the most common ways to interact with the ESP32 is through a display, and the 16×2 LCD is a popular choice for this purpose. In this blog post, we’ll guide you through the process of setting up an ESP32 with a 16×2 LCD display using an I2C module, exploring various applications, and providing valuable tips for a successful implementation.
Hardware Requirements
To get started, you’ll need the following components:
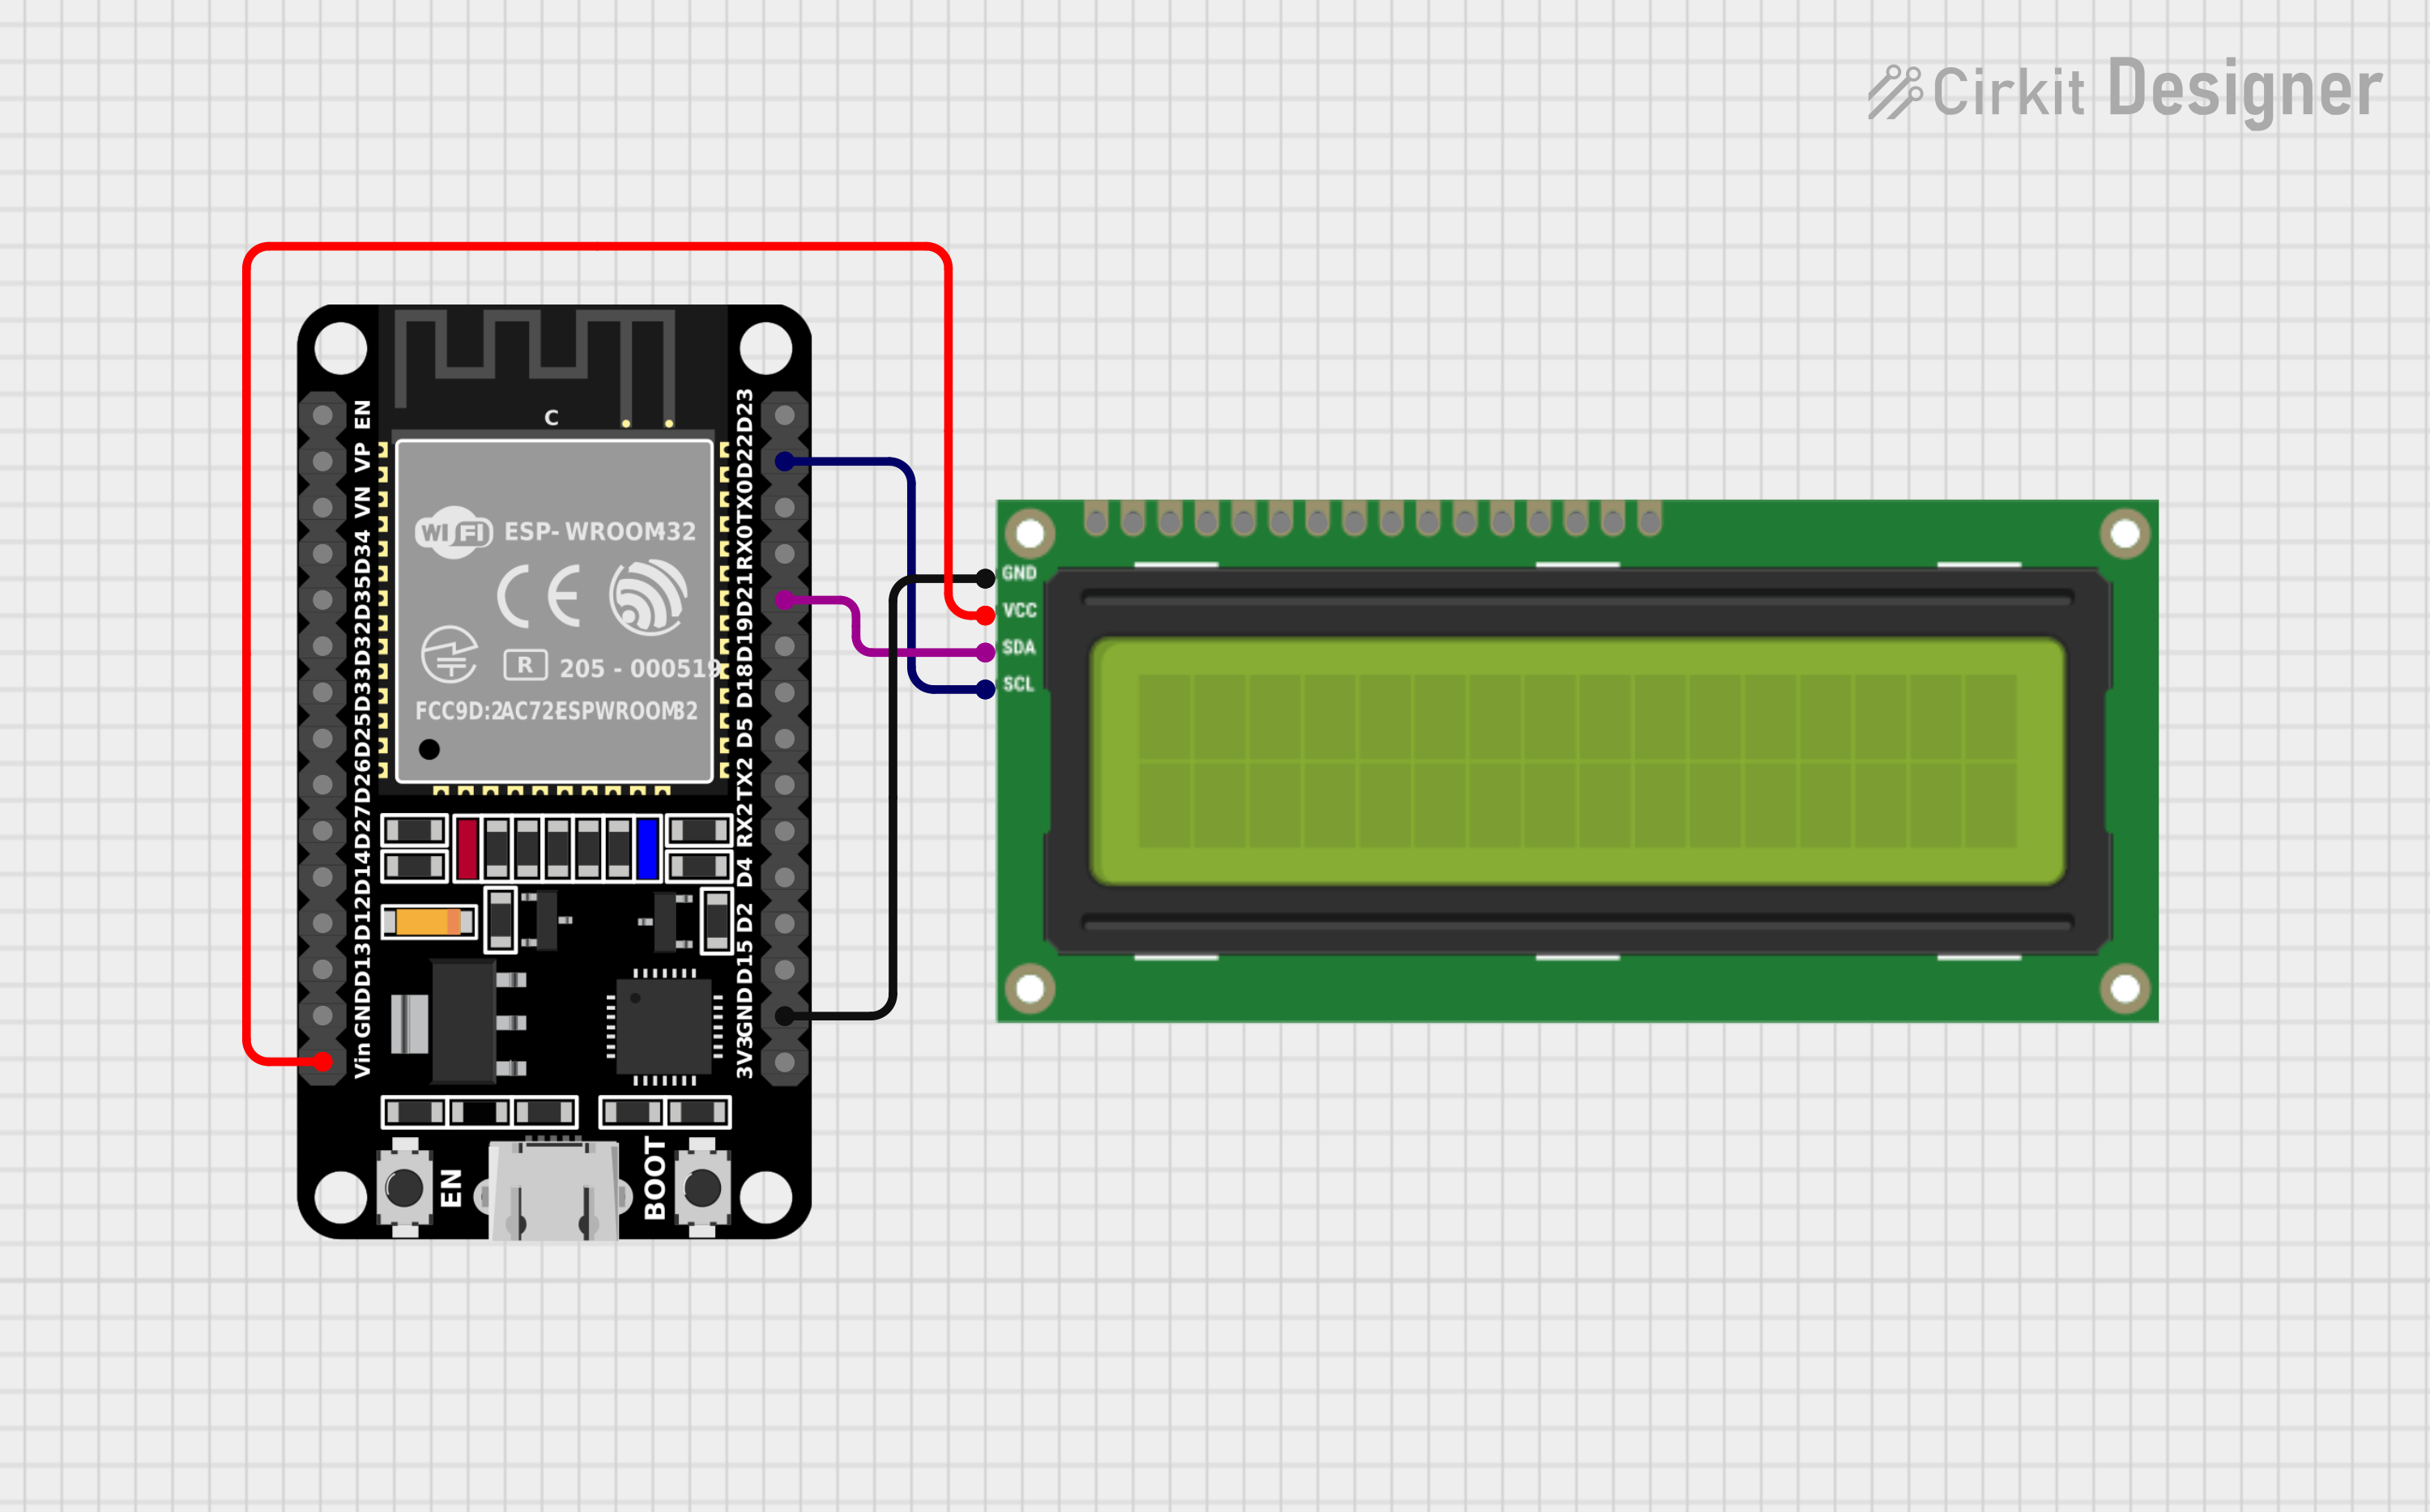
- ESP32 development board: Choose a suitable board based on your project needs, such as the ESP32-WROOM-32 or ESP32-CAM.
- 16×2 LCD display module: Consider factors like display size, backlight color, and power consumption when selecting an LCD.
- I2C module: An I2C module (e.g., PCF8574, MCP23017) is required to interface with the LCD using I2C communication.
- Jumper wires: Ensure you have a sufficient number of jumper wires for connecting the ESP32, I2C module, and LCD.
- Breadboard: Optional, but can be helpful for prototyping and testing.
Wiring the Components
- Connect the I2C module to the ESP32: Connect the SDA and SCL pins of the I2C module to the corresponding SDA and SCL pins on the ESP32.
- Connect the LCD to the I2C module: Refer to the datasheet of your specific I2C module for the exact wiring instructions. Typically, you’ll need to connect the data pins (D0-D7) of the LCD to the data pins of the I2C module.
- Power the components: Connect the VCC and GND pins of the ESP32, I2C module, and LCD to a common power source.
Software Setup
- Install the ESP32 Development Environment: Choose your preferred development environment, such as Arduino IDE or PlatformIO. Make sure to install the necessary libraries for ESP32 and I2C communication.
- I2C Library: Include the I2C library in your code. The specific library may vary, but popular options include Wire.h for Arduino IDE.
- LCD Library: Include the LCD library specifically designed for I2C communication. Examples include LiquidCrystal_I2C.h.
- Initialize the I2C module and LCD: In your setup() function, initialize the I2C module and the LCD object with the appropriate parameters (e.g., I2C address, data pins).
Basic Examples
Once you have the hardware connected and the software set up, you can start experimenting with the LCD. Here are a few basic examples:
Display a Message: C++
#include <Wire.h>
#include <LiquidCrystal_I2C.h>

LiquidCrystal_I2C lcd(0x27, 16, 2);

void setup() {

Wire.begin();
lcd.init();

}

void loop() {

 lcd.setCursor(0, 0);
 lcd.print("Hello, world!");

 }
Advanced Applications
- Custom Character Sets: Create custom character sets to display unique symbols or icons.
- Scrolling Text: Implement scrolling text to display longer messages on the limited screen space.
- Data Logging: Log sensor data or other information to the LCD for later analysis.
- Interactive Applications: Create interactive applications that allow users to input data or control devices through the LCD.
Tips for Success
- Proper Power Supply: Ensure a stable and reliable power supply to avoid display flickering or other issues.
- LCD Contrast Adjustment: Adjust the contrast of the LCD for optimal readability.
- Error Handling: Implement error handling mechanisms to gracefully handle unexpected situations.
- Code Optimization: Optimize your code for efficient resource usage, especially when dealing with limited memory and processing power.
Conclusion
The ESP32 and 16×2 LCD display combination, coupled with an I2C module, offer a powerful and versatile platform for various projects, from simple displays to complex IoT applications. By following the steps outlined in this blog post and incorporating the advanced applications and tips, you can create innovative and engaging projects that leverage the capabilities of the ESP32, I2C module, and LCD.


Leave a Reply
You must be logged in to post a comment.