

ESP32 and Flame Sensor: A Beginner’s Guide
Introduction
The ESP32 is a powerful and versatile microcontroller that has gained immense popularity in the IoT and embedded systems world. Its low cost, Wi-Fi and Bluetooth capabilities, and rich feature set make it an ideal choice for various projects. In this blog post, we’ll explore how to combine the ESP32 with a flame sensor to create a simple fire detection system.
Understanding the Flame Sensor
A flame sensor is a device that detects the presence of a flame or fire. It typically works by sensing infrared radiation emitted by a flame. There are different types of flame sensors available, but for our project, we’ll use a basic infrared flame sensor module.
Connecting the Flame Sensor to ESP32
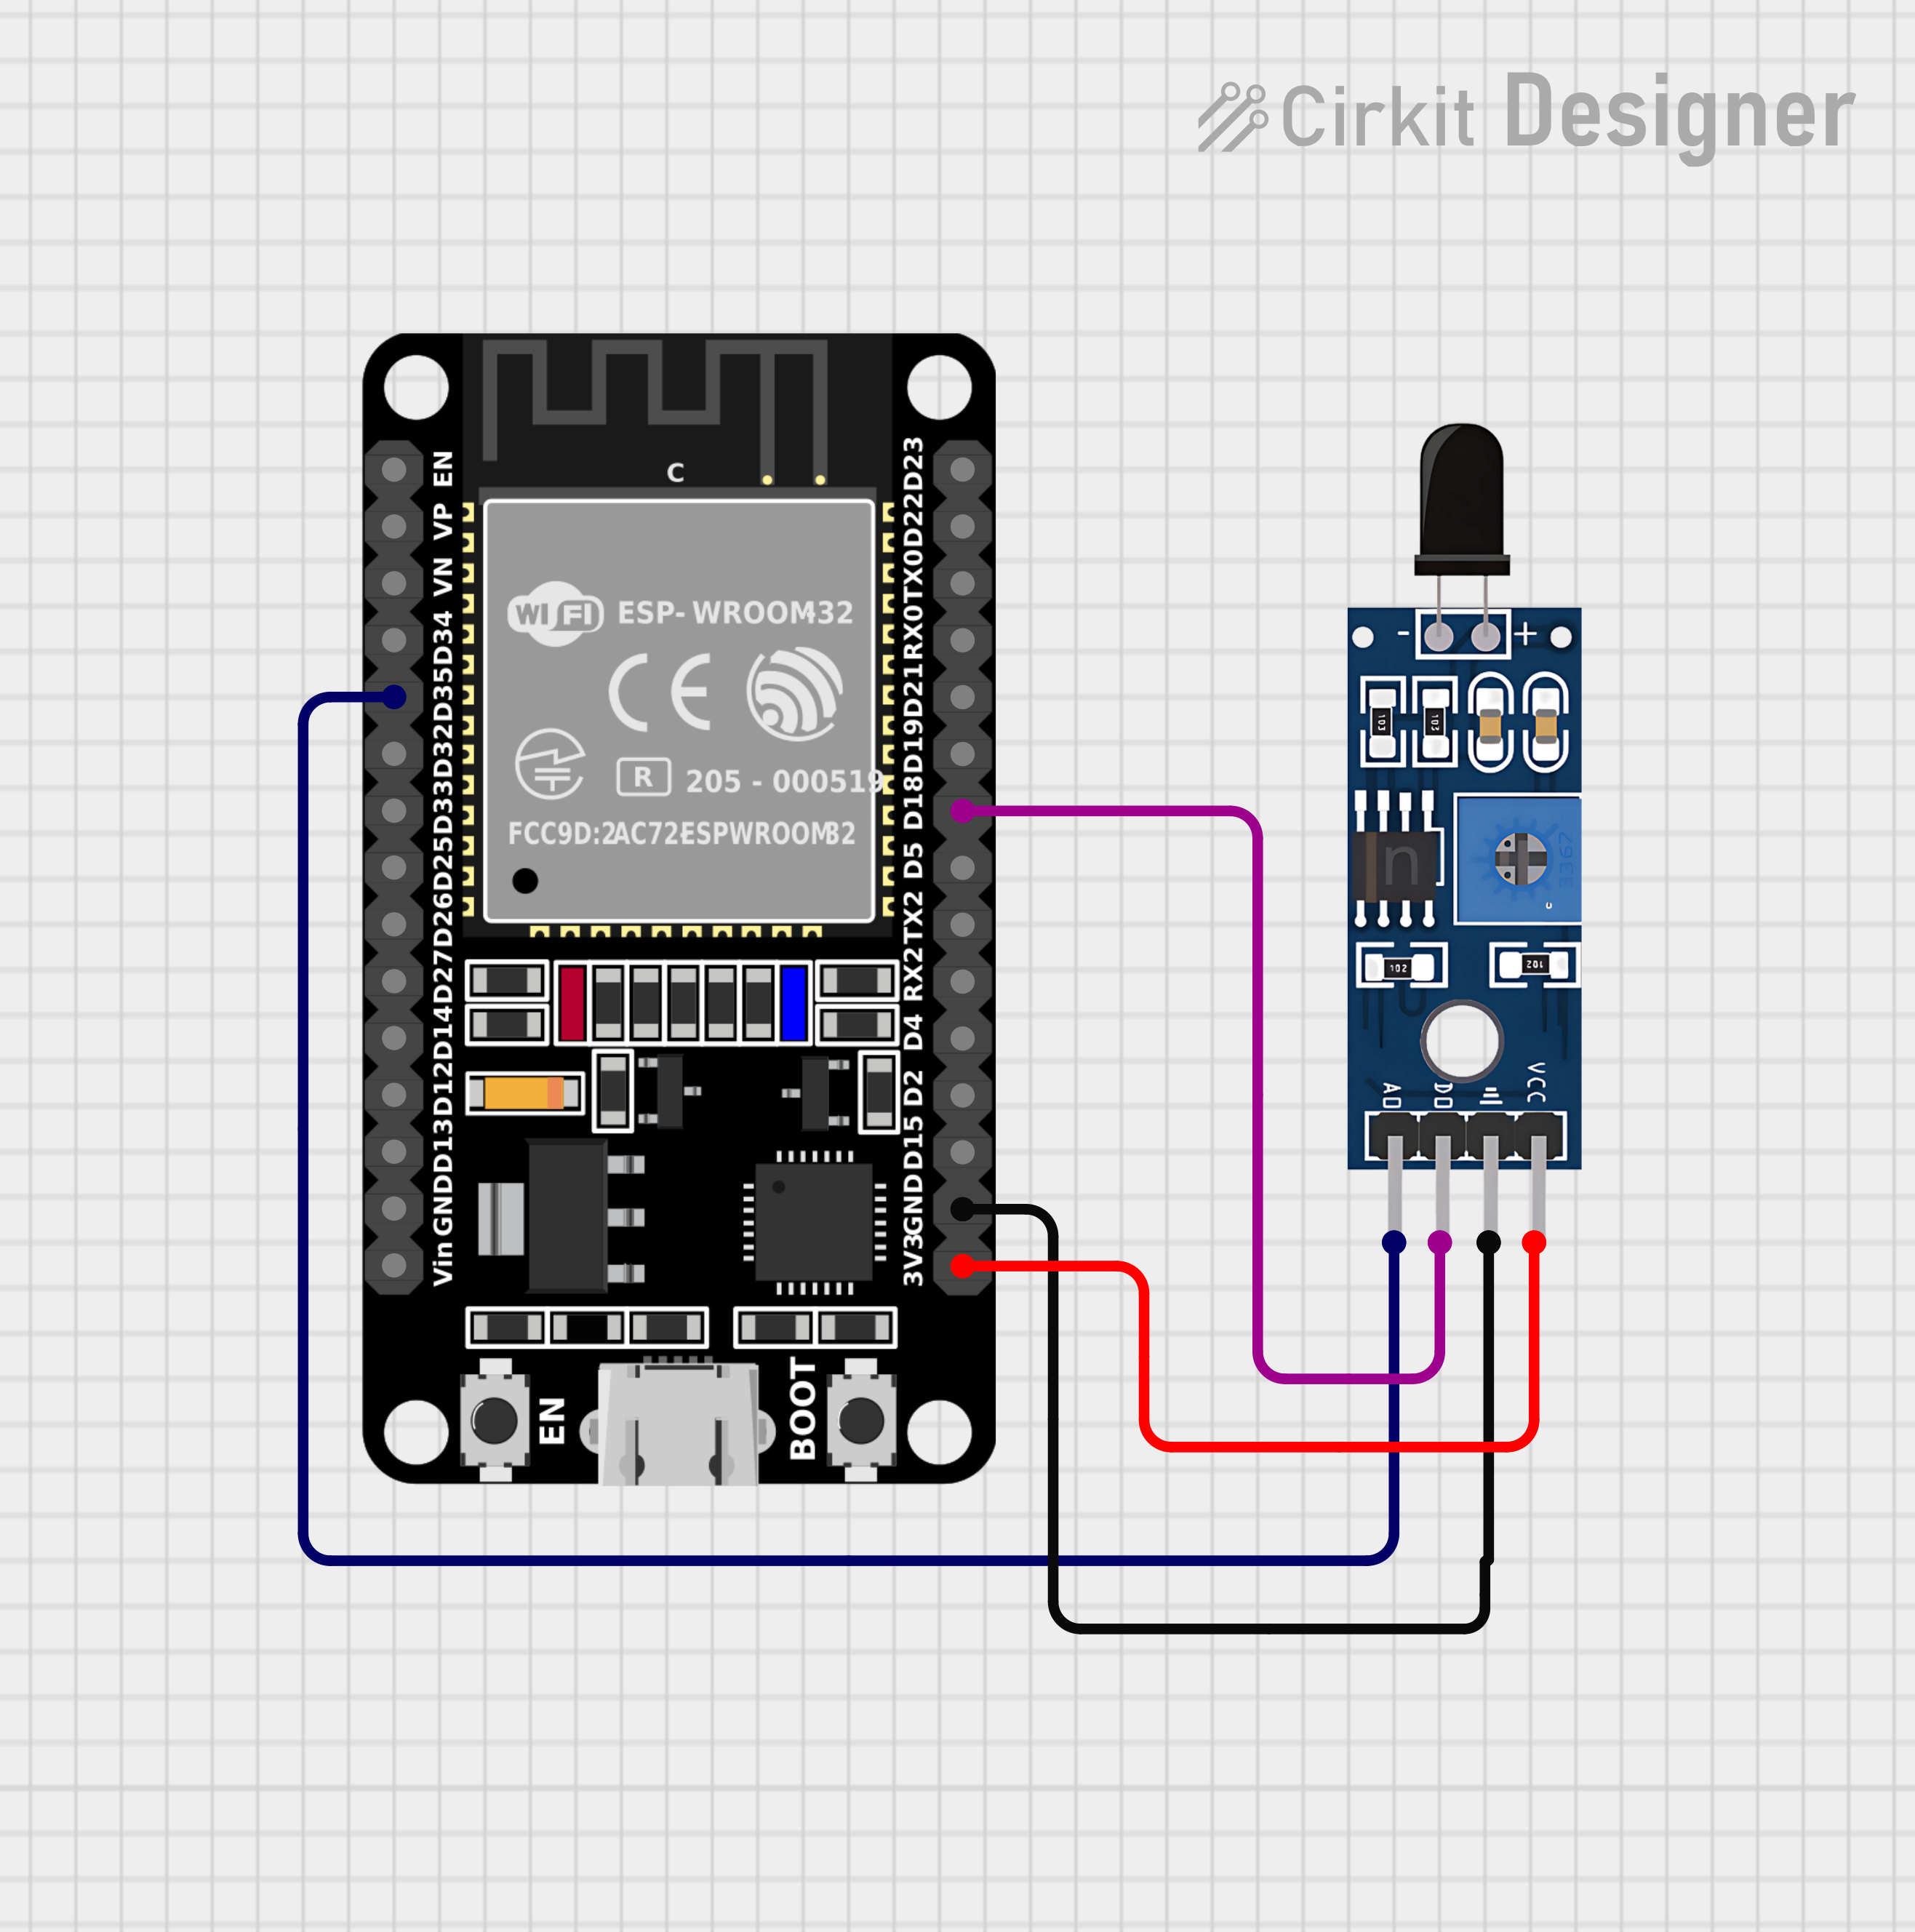
- Gather the components: You’ll need an ESP32 development board, a flame sensor module, jumper wires, and a breadboard.
- Identify the pins: Consult the datasheet of your ESP32 and flame sensor to determine the appropriate pins for connection. Usually, the flame sensor has two pins: VCC (power supply) and OUT (output).
- Connect the components: Connect the VCC pin of the flame sensor to the 3.3V pin on the ESP32. Connect the OUT pin of the flame sensor to a digital input pin on the ESP32.
Programming the ESP32
We’ll use the Arduino IDE to program the ESP32. Here’s a basic code snippet that reads the flame sensor’s output and prints the result to the serial monitor:
C++
// Define the pins connected to the flame sensor
const int analogPin = 35; // A0 connected to D35
const int digitalPin = 18; // D0 connected to D18

void setup() {
  // Initialize serial communication at 115200 baud rate
  Serial.begin(115200);

  // Set the digital pin as input
  pinMode(digitalPin, INPUT);
}

void loop() {
  // Read the analog value from the flame sensor
  int analogValue = analogRead(analogPin);

  // Read the digital value from the flame sensor
  int digitalValue = digitalRead(digitalPin);

  // Print the values to the Serial Monitor
  Serial.print("Analog Value: ");
  Serial.print(analogValue);
  Serial.print(" | Digital Value: ");
  Serial.println(digitalValue);

  // Add a small delay to avoid flooding the Serial Monitor
  delay(500);
}
Explanation:
- The
flameSensorPinvariable is defined to represent the pin connected to the flame sensor’s OUT pin. - In the
setup()function, the serial monitor is initialized, and theflameSensorPinis set as an input. - In the
loop()function, thedigitalRead()function is used to read the value from the flame sensor pin. - If the sensor value is
HIGH, it indicates that a flame is detected, and a message is printed to the serial monitor. Otherwise, it indicates no flame is detected. - A delay of 1 second is added to prevent excessive serial output.
Additional Features
Once you have a basic flame detection system working, you can explore additional features:
- Trigger an alarm: Connect a buzzer or LED to the ESP32 and activate it when a flame is detected.
- Send notifications: Use the ESP32’s Wi-Fi capabilities to send notifications via email or SMS.
- Integrate with home automation systems: Connect the system to platforms like Home Assistant for remote monitoring and control.
Conclusion
Combining the ESP32 with a flame sensor provides a cost-effective and versatile solution for fire detection applications. By following the steps outlined in this blog post, you can create a simple yet functional flame detection system that can be customized to suit your specific needs.


Leave a Reply
You must be logged in to post a comment.