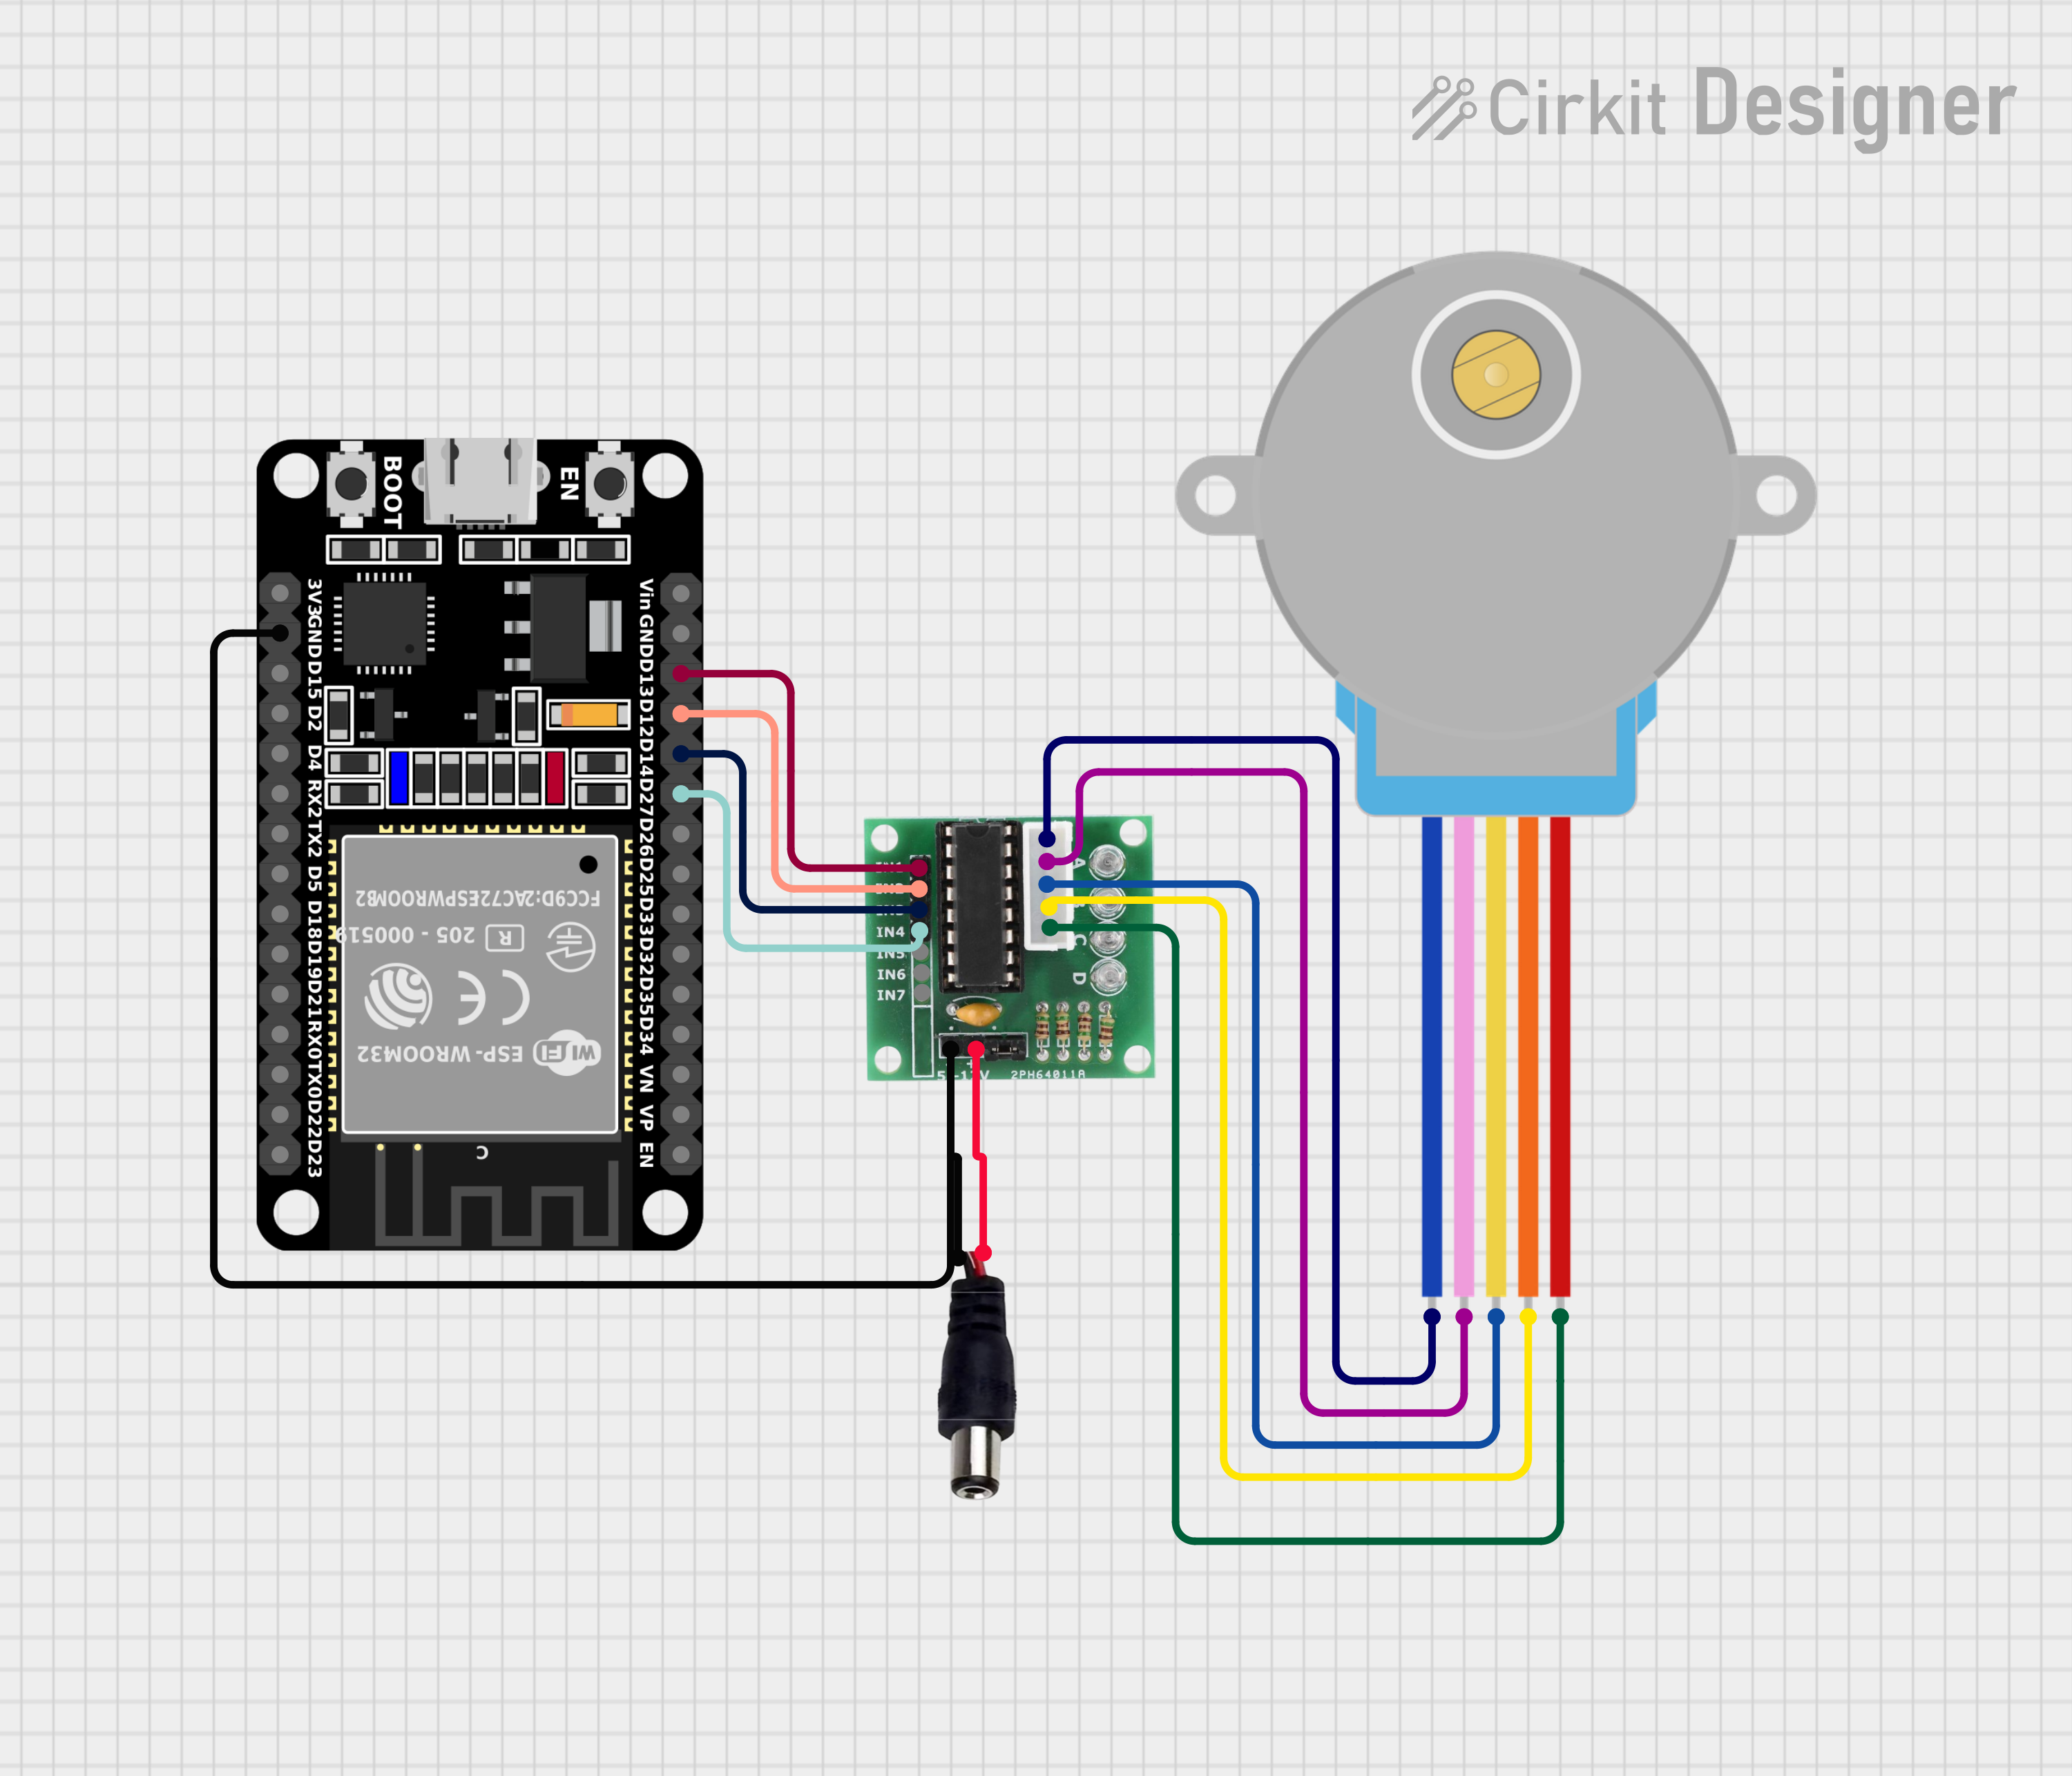
ESP32, ULN2003, and 28BYJ-48: A DIY Stepper Motor Control Project
Introduction In the realm of DIY electronics, stepper motors are versatile components that can be used to create a wide range of projects, from 3D printers to robotic arms. The ESP32, a powerful microcontroller, coupled with a ULN2003 driver and a 28BYJ-48 stepper motor, provides a robust and affordable solution for precise motor control. In this blog post, we’ll delve into the specifics of this combination and guide you through a basic setup.
Understanding the Components
- ESP32:
- A versatile microcontroller with Wi-Fi and Bluetooth capabilities.
- Offers a wide range of GPIO pins for controlling various devices.
- Supports multiple programming languages, including Arduino and MicroPython.
- ULN2003:
- A Darlington transistor array that acts as a driver for stepper motors.
- Amplifies the low-current signals from the microcontroller to drive the higher-current requirements of the motor.
- Protects the microcontroller from potential damage caused by the motor’s back EMF.
- 28BYJ-48:
- A unipolar stepper motor with a 48-step resolution per revolution.
- Commonly used in DIY projects due to its low cost and ease of use.
- Requires a driver to control its four coils.
C++
#include<Stepper.h>

const int stepsPerRevolution = 2048; // Calculated based on 48 steps/rev and 42 microstepping
const int motorPin1 = 12;
const int motorPin2 = 13;
const int motorPin3 = 14;
const int motorPin4 = 27;

Stepper myStepper(stepsPerRevolution, motorPin1, motorPin2, motorPin3, motorPin4);

void setup() {
  myStepper.setSpeed(60); // Adjust speed as needed
}

void loop() {
  myStepper.step(stepsPerRevolution / 2); // Half rotation
  delay(1000);
  myStepper.step(-stepsPerRevolution / 2); // Half rotation backward
  delay(1000);
}
Explanation:
- Include the Stepper Library: Incorporate the
Stepperlibrary to simplify motor control. - Define Constants: Set the steps per revolution, which is calculated based on the motor’s step resolution and the desired microstepping.
- Create a Stepper Object: Instantiate a
Stepperobject, specifying the number of steps per revolution and the pins connected to the motor. - Set the Speed: Use the
setSpeed()function to adjust the motor’s rotation speed. - Control the Motor: Employ the
step()function to rotate the motor in either direction. Positive values rotate clockwise, and negative values rotate counterclockwise.
Expanding Your Project
Once you have a basic understanding of the setup, you can explore more advanced applications:
- Microstepping: Increase the motor’s resolution by dividing each full step into smaller increments.
- Closed-Loop Control: Use sensors like encoders or potentiometers to precisely control the motor’s position.
- Complex Motion Profiles: Implement smooth acceleration, deceleration, and velocity profiles for precise movement.
- Wireless Control: Utilize the ESP32’s Wi-Fi or Bluetooth capabilities to control the motor remotely.
By combining the power of the ESP32, the driving capabilities of the ULN2003, and the precision of the 28BYJ-48 stepper motor, you can create a wide range of innovative projects.


Leave a Reply
You must be logged in to post a comment.