

05Sep
ESP32 with a water level sensor
ESP32 with a water level sensor:
Hardware Setup:
- Gather the necessary components:
- ESP32 development board
- Water level sensor module
- Jumper wires
- Breadboard (optional)
- Power supply (3.3V or 5V)
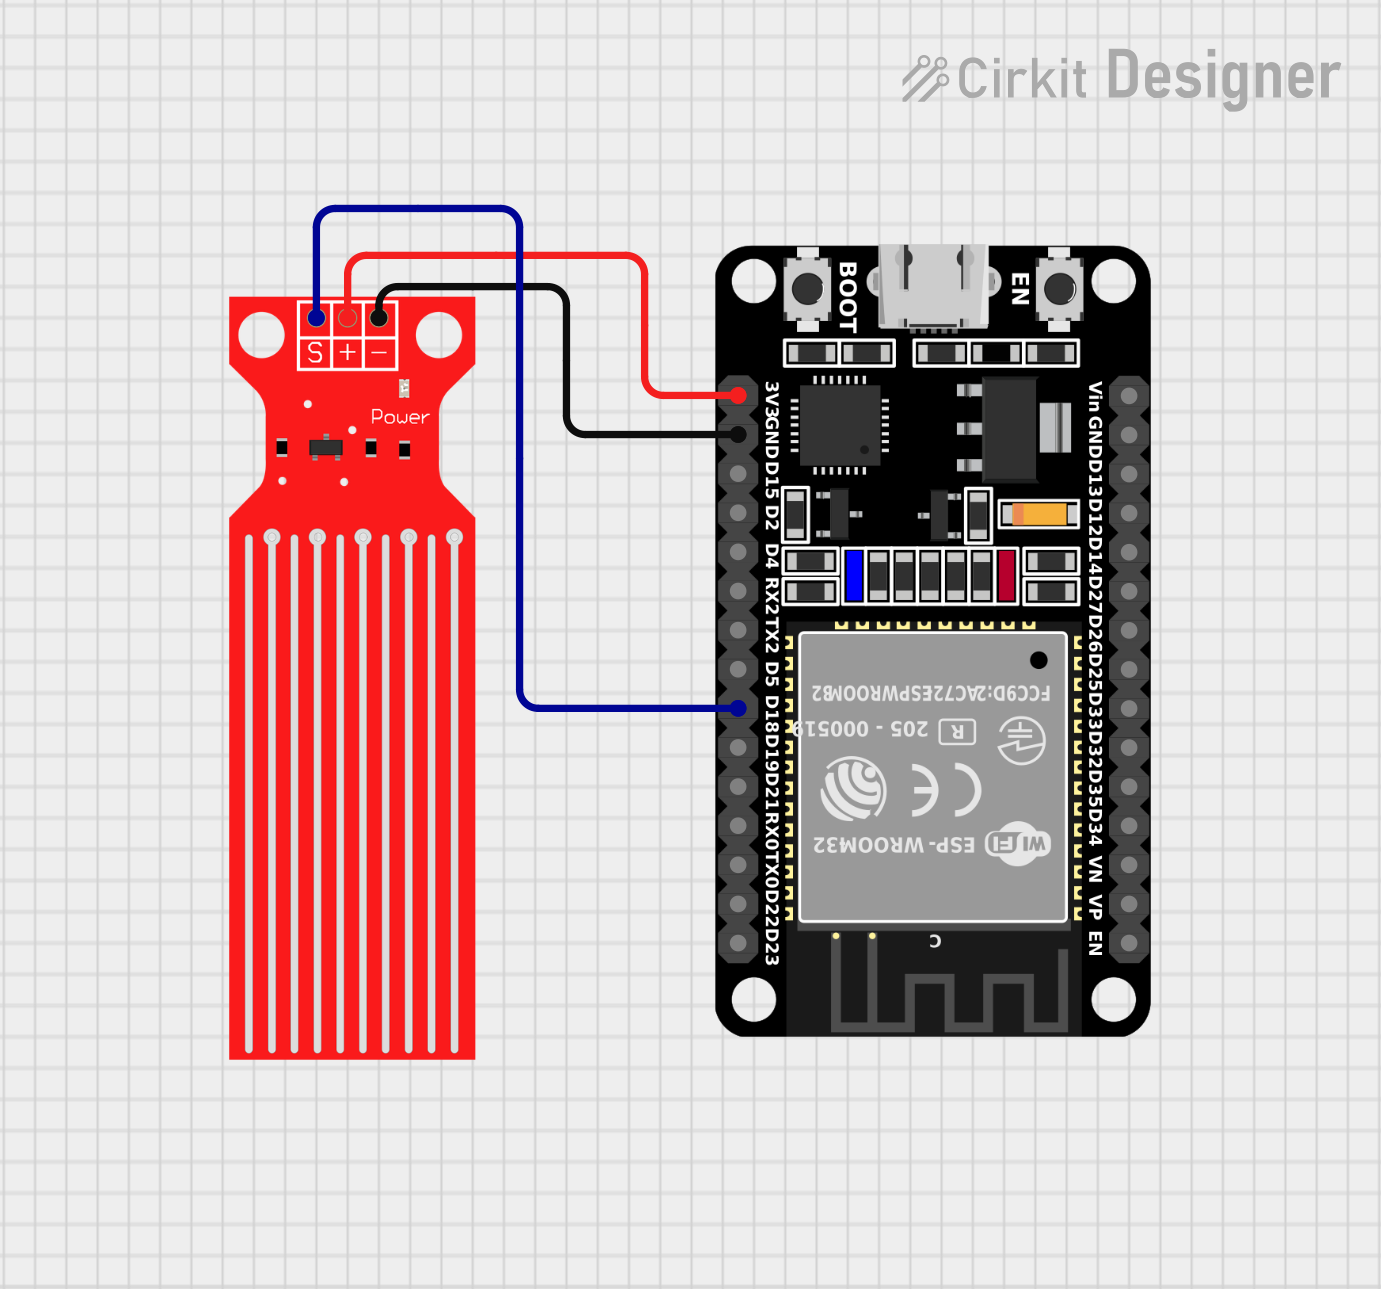
- Connect the water level sensor to the ESP32:
- Connect the VCC pin of the sensor to the 3.3V or 5V output of the ESP32.
- Connect the GND pin of the sensor to the ground pin of the ESP32.
- Connect the output pin of the sensor (usually labeled “OUT”) to a digital input pin on the ESP32 (e.g., GPIO13).
Software Setup:
- Install the Arduino IDE: Download and install the Arduino IDE from https://support.arduino.cc/hc/en-us/articles/360019833020-Download-and-install-Arduino-IDE.
- Install the ESP32 board support package: Open the Arduino IDE, go to File > Preferences, and add the following URL to the Additional Boards Manager URLs field:
https://dl.espressif.com/package/esp32/index.json. Then, go to Tools > Board > Boards Manager and install the “ESP32” board.
Code:
//C++
const int sensorPin = 18; // change as per your board

void setup() {
  pinMode(sensorPin, INPUT);
}

void loop() {
  int sensorValue = analogRead(sensorPin);


    Serial.print("Water level Value :");
    Serial.print(sensorValue);


  delay(1000);
}
Explanation:
- The code defines the GPIO pin connected to the water level sensor.
- In the
setup()function, the sensor pin is initialized as an input. - In the
loop()function, thedigitalRead()function is used to read the value from the sensor pin. - If the sensor value is HIGH, it means the water level is high. If the value is LOW, the water level is low.
Uploading the Code:
- Connect the ESP32 to your computer.
- Select the correct board and port in the Arduino IDE.
- Compile and upload the code to the ESP32.
Testing:
- Open the serial monitor in the Arduino IDE.
- Adjust the water level near the sensor and observe the messages printed in the serial monitor.
Additional Notes:
- The output of the water level sensor might be inverted, so you might need to adjust the code accordingly (e.g.,
if (sensorValue == LOW)). - You can customize the code to perform different actions based on the sensor’s readings (e.g., triggering alarms, controlling pumps).
- The sensitivity of the water level sensor can vary depending on the specific model. Consult the sensor’s datasheet for more information.
By following these steps, you can effectively use an ESP32 to monitor water levels using a water level sensor.


Leave a Reply
You must be logged in to post a comment.