

25Oct
Integrating Neo-M8N GPS with ESP32: A Comprehensive Guide
Understanding the Components
- ESP32: A powerful, versatile microcontroller with Wi-Fi and Bluetooth capabilities.
- Neo-M8N: A high-performance GNSS receiver capable of tracking multiple satellite constellations.
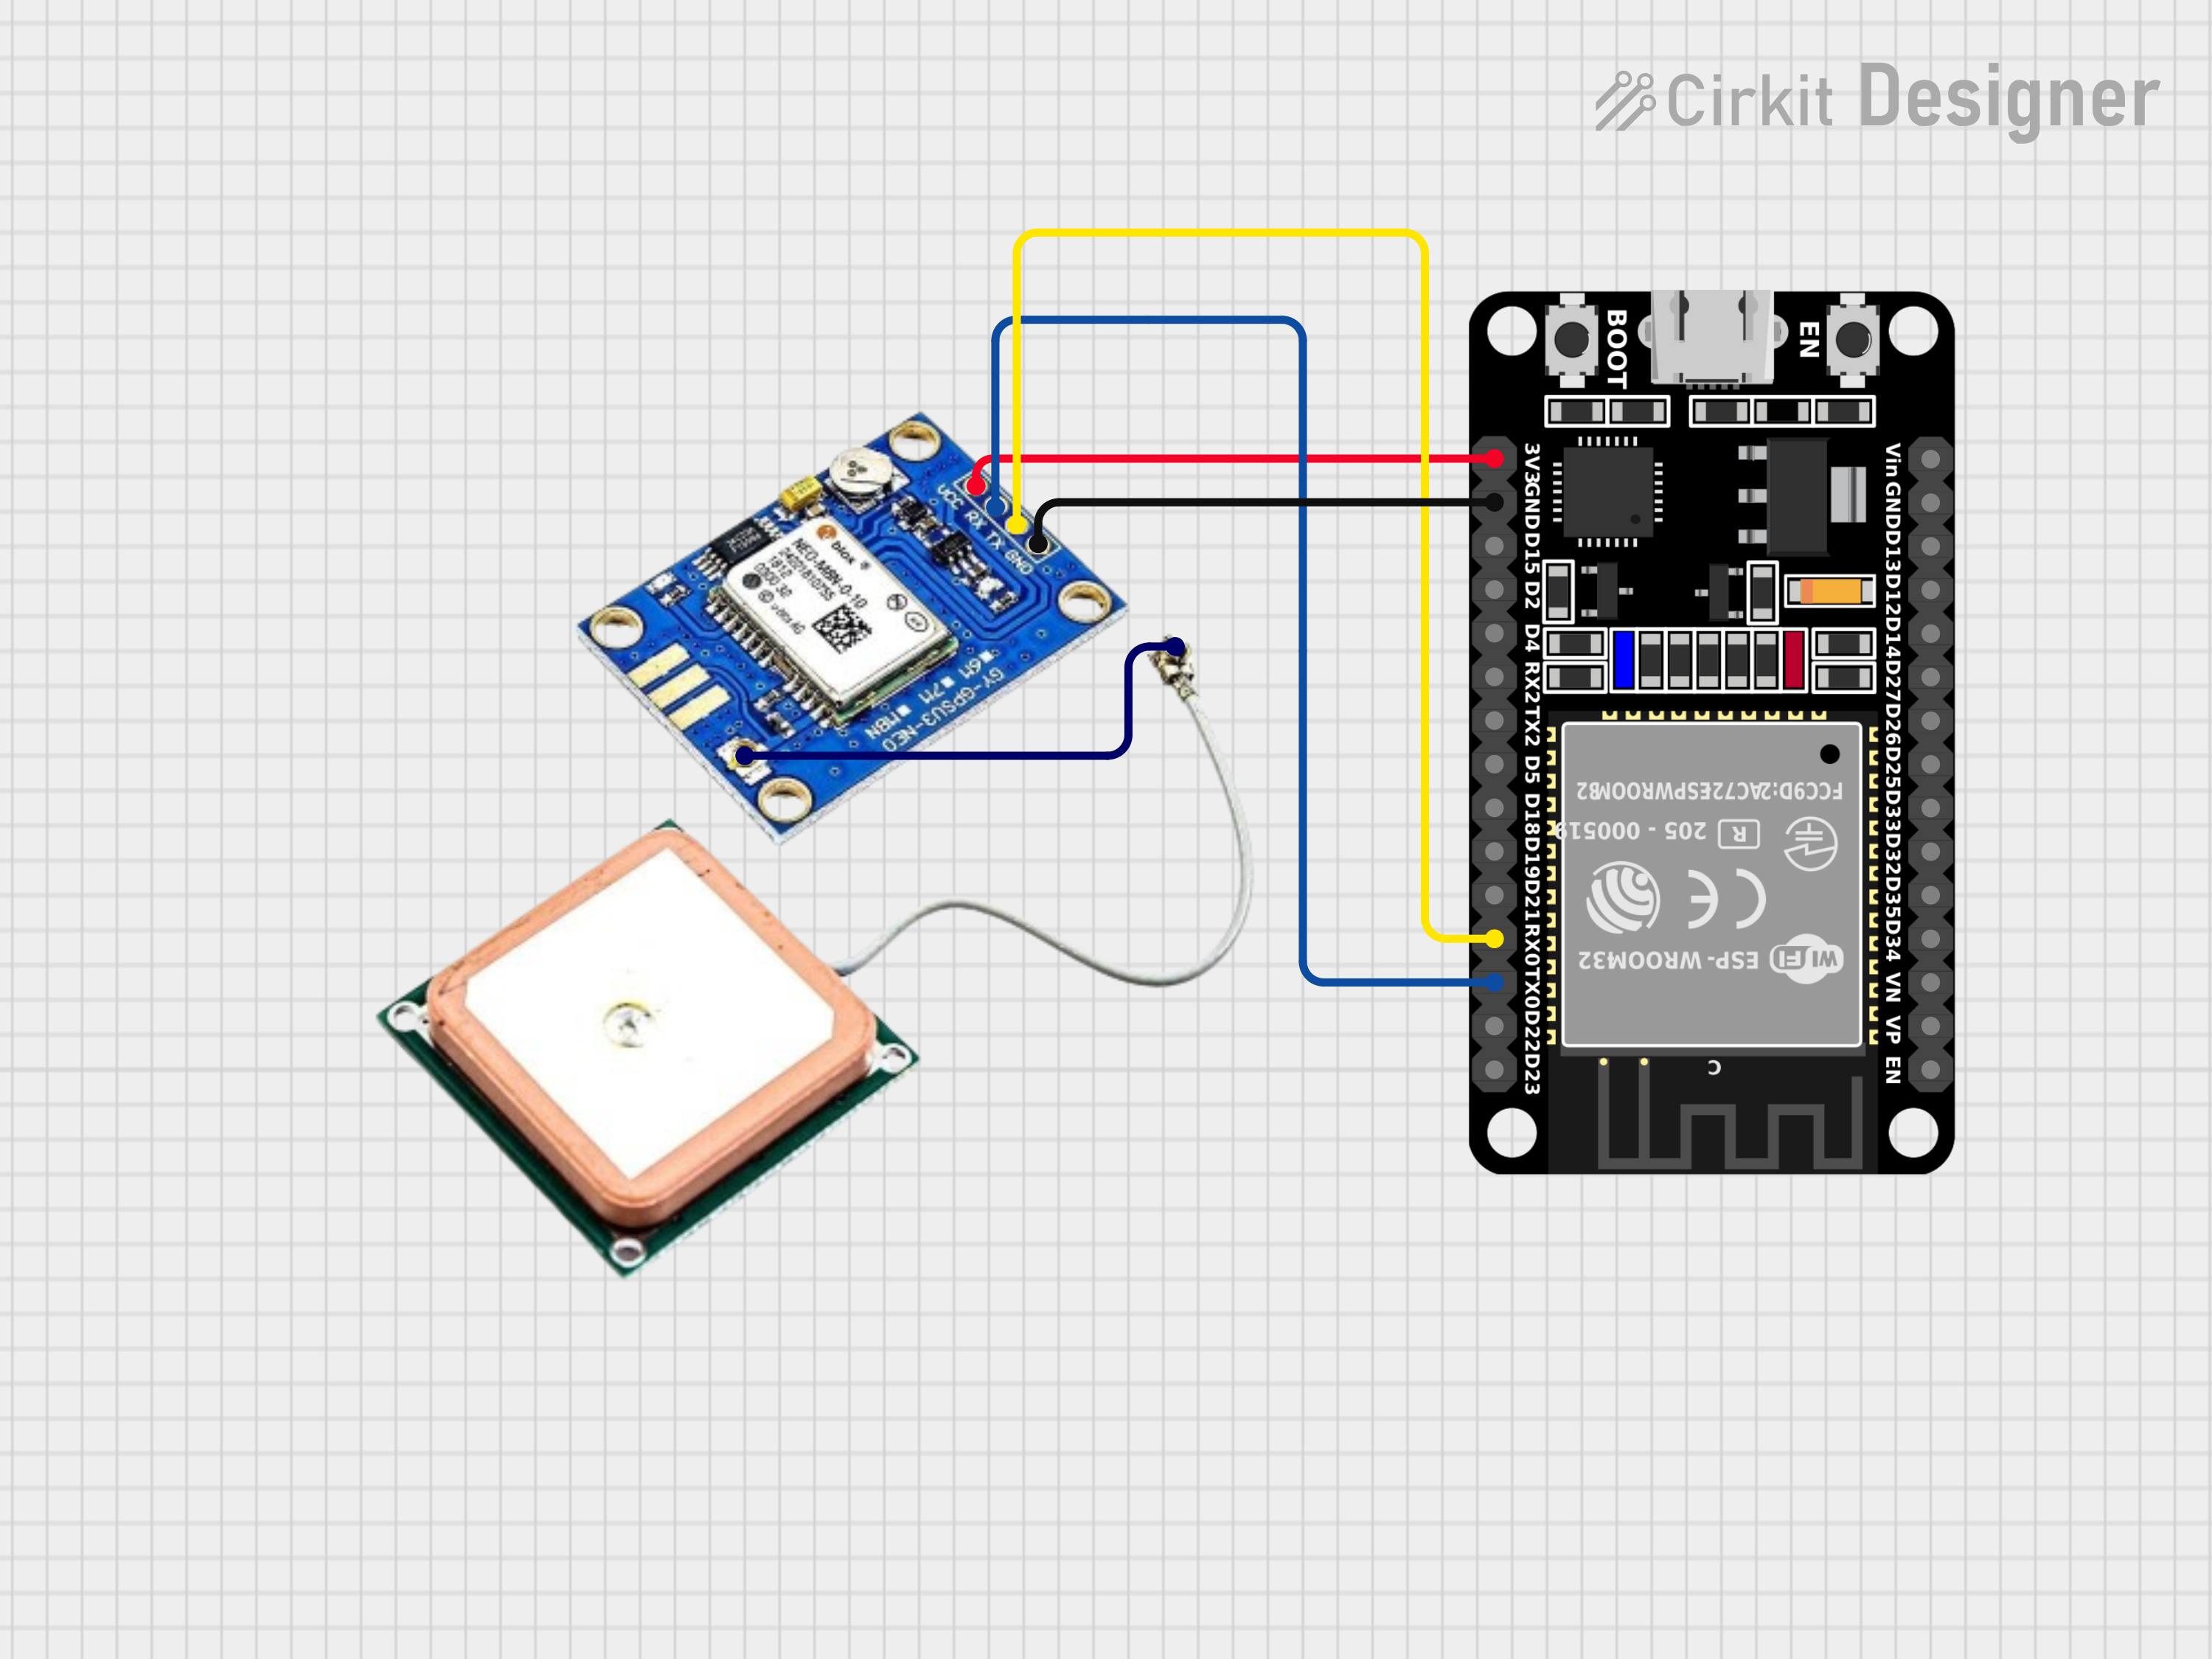
Connecting the Hardware
- Power Supply: Ensure both the ESP32 and Neo-M8N are powered from a common 3.3V power source.
- Serial Communication: Connect the TX and RX pins of the Neo-M8N to the corresponding RX and TX pins on the ESP32.
- Ground: Connect the ground pins of both devices.
Software Setup
1. Arduino IDE:
- Install Necessary Libraries:
- TinyGPSPlus: This library simplifies parsing NMEA sentences from the GPS module. You can install it via the Library Manager in the Arduino IDE.
- Code Implementation:
C++
#include <TinyGPSPlus.h>

#define RXD2 16
#define TXD2 17

#define GPS_BAUD 9600

TinyGPSPlus gps;

HardwareSerial gpsSerial(2);

void setup() {
  Serial.begin(115200);

  gpsSerial.begin(GPS_BAUD, SERIAL_8N1, RXD2, TXD2);
  Serial.println("Serial 2 started at 9600 baud rate");
}

void loop() {
  unsigned long start = millis();

  while (millis() - start < 1000) {
    while (gpsSerial.available() > 0) {
      gps.encode(gpsSerial.read());
    }
    if (gps.location.isUpdated()) {
      Serial.print("LAT: ");
      Serial.println(gps.location.lat(), 6);
      Serial.print("LONG: ");
      Serial.println(gps.location.lng(), 6);
      Serial.print("SPEED (km/h) = ");
      Serial.println(gps.speed.kmph());
      Serial.print("ALT (min)= ");
      Serial.println(gps.altitude.meters());
      Serial.print("HDOP = ");
      Serial.println(gps.hdop.value() / 100.0);
      Serial.print("Satellites = ");
      Serial.println(gps.satellites.value());
      Serial.print("Time in UTC: ");
      Serial.println(String(gps.date.year()) + "/" + String(gps.date.month()) + "/" + String(gps.date.day()) + "," + String(gps.time.hour()) + ":" + String(gps.time.minute()) + ":" + String(gps.time.second()));
      Serial.println("");
    }
  }
}
2. ESP-IDF:
- Install Necessary Components:
- Refer to the ESP-IDF documentation for detailed instructions on installing and configuring the ESP-IDF framework.
- Install the
mjd_neom8ncomponent, which provides a driver for the Neo-M8N.
- Code Implementation:
Refer to the mjd_neom8n component’s examples for detailed code snippets and explanations. The component provides functions to initialize the GPS module, read GPS data, and control various settings.
Tips for Optimal Performance:
- Antenna Placement: Place the antenna in an open area with clear sky view for better signal reception.
- Power Supply: Ensure a stable 3.3V power supply to avoid noise and power fluctuations.
- Serial Communication: Use appropriate baud rates and error correction mechanisms to ensure reliable data transmission.
- Data Parsing: Use efficient parsing techniques to extract the required information from the NMEA sentences.
- Power Saving: Utilize the power-saving modes of the Neo-M8N to conserve battery power.
By following these guidelines, you can effectively integrate the Neo-M8N GPS module with your ESP32 projects and obtain accurate location data.
Would you like to delve deeper into a specific aspect of this integration, such as configuring the Neo-M8N for specific modes or optimizing power consumption?

Leave a Reply
You must be logged in to post a comment.