

Controlling Stepper Motors with ESP32 and L298N:
Comprehensive Guide
Introduction
Stepper motors are a type of electric motor that moves in discrete steps, making them ideal for precise positioning and control. The ESP32 is a powerful microcontroller that can be used to control various electronic devices, including stepper motors. The L298N is a popular motor driver IC that can be used to interface the ESP32 with the stepper motor.
Understanding Stepper Motors
Stepper motors are characterized by their ability to rotate in precise steps, making them suitable for applications like robotics, 3D printing, and automation. There are two main types of stepper motors:
- Unipolar: These motors have five or six leads, and each winding can be energized individually.
- Bipolar: These motors have four leads, and the direction of current flow determines the direction of rotation.
The ESP32 Microcontroller
The ESP32 is a low-cost, high-performance microcontroller that is ideal for IoT and embedded applications. It has built-in Wi-Fi and Bluetooth capabilities, making it a versatile choice for various projects.
The L298N Motor Driver
The L298N is a dual H-bridge motor driver IC that can be used to control two DC motors or a single stepper motor. It has a maximum output current of 3A and can handle voltages up to 46V.
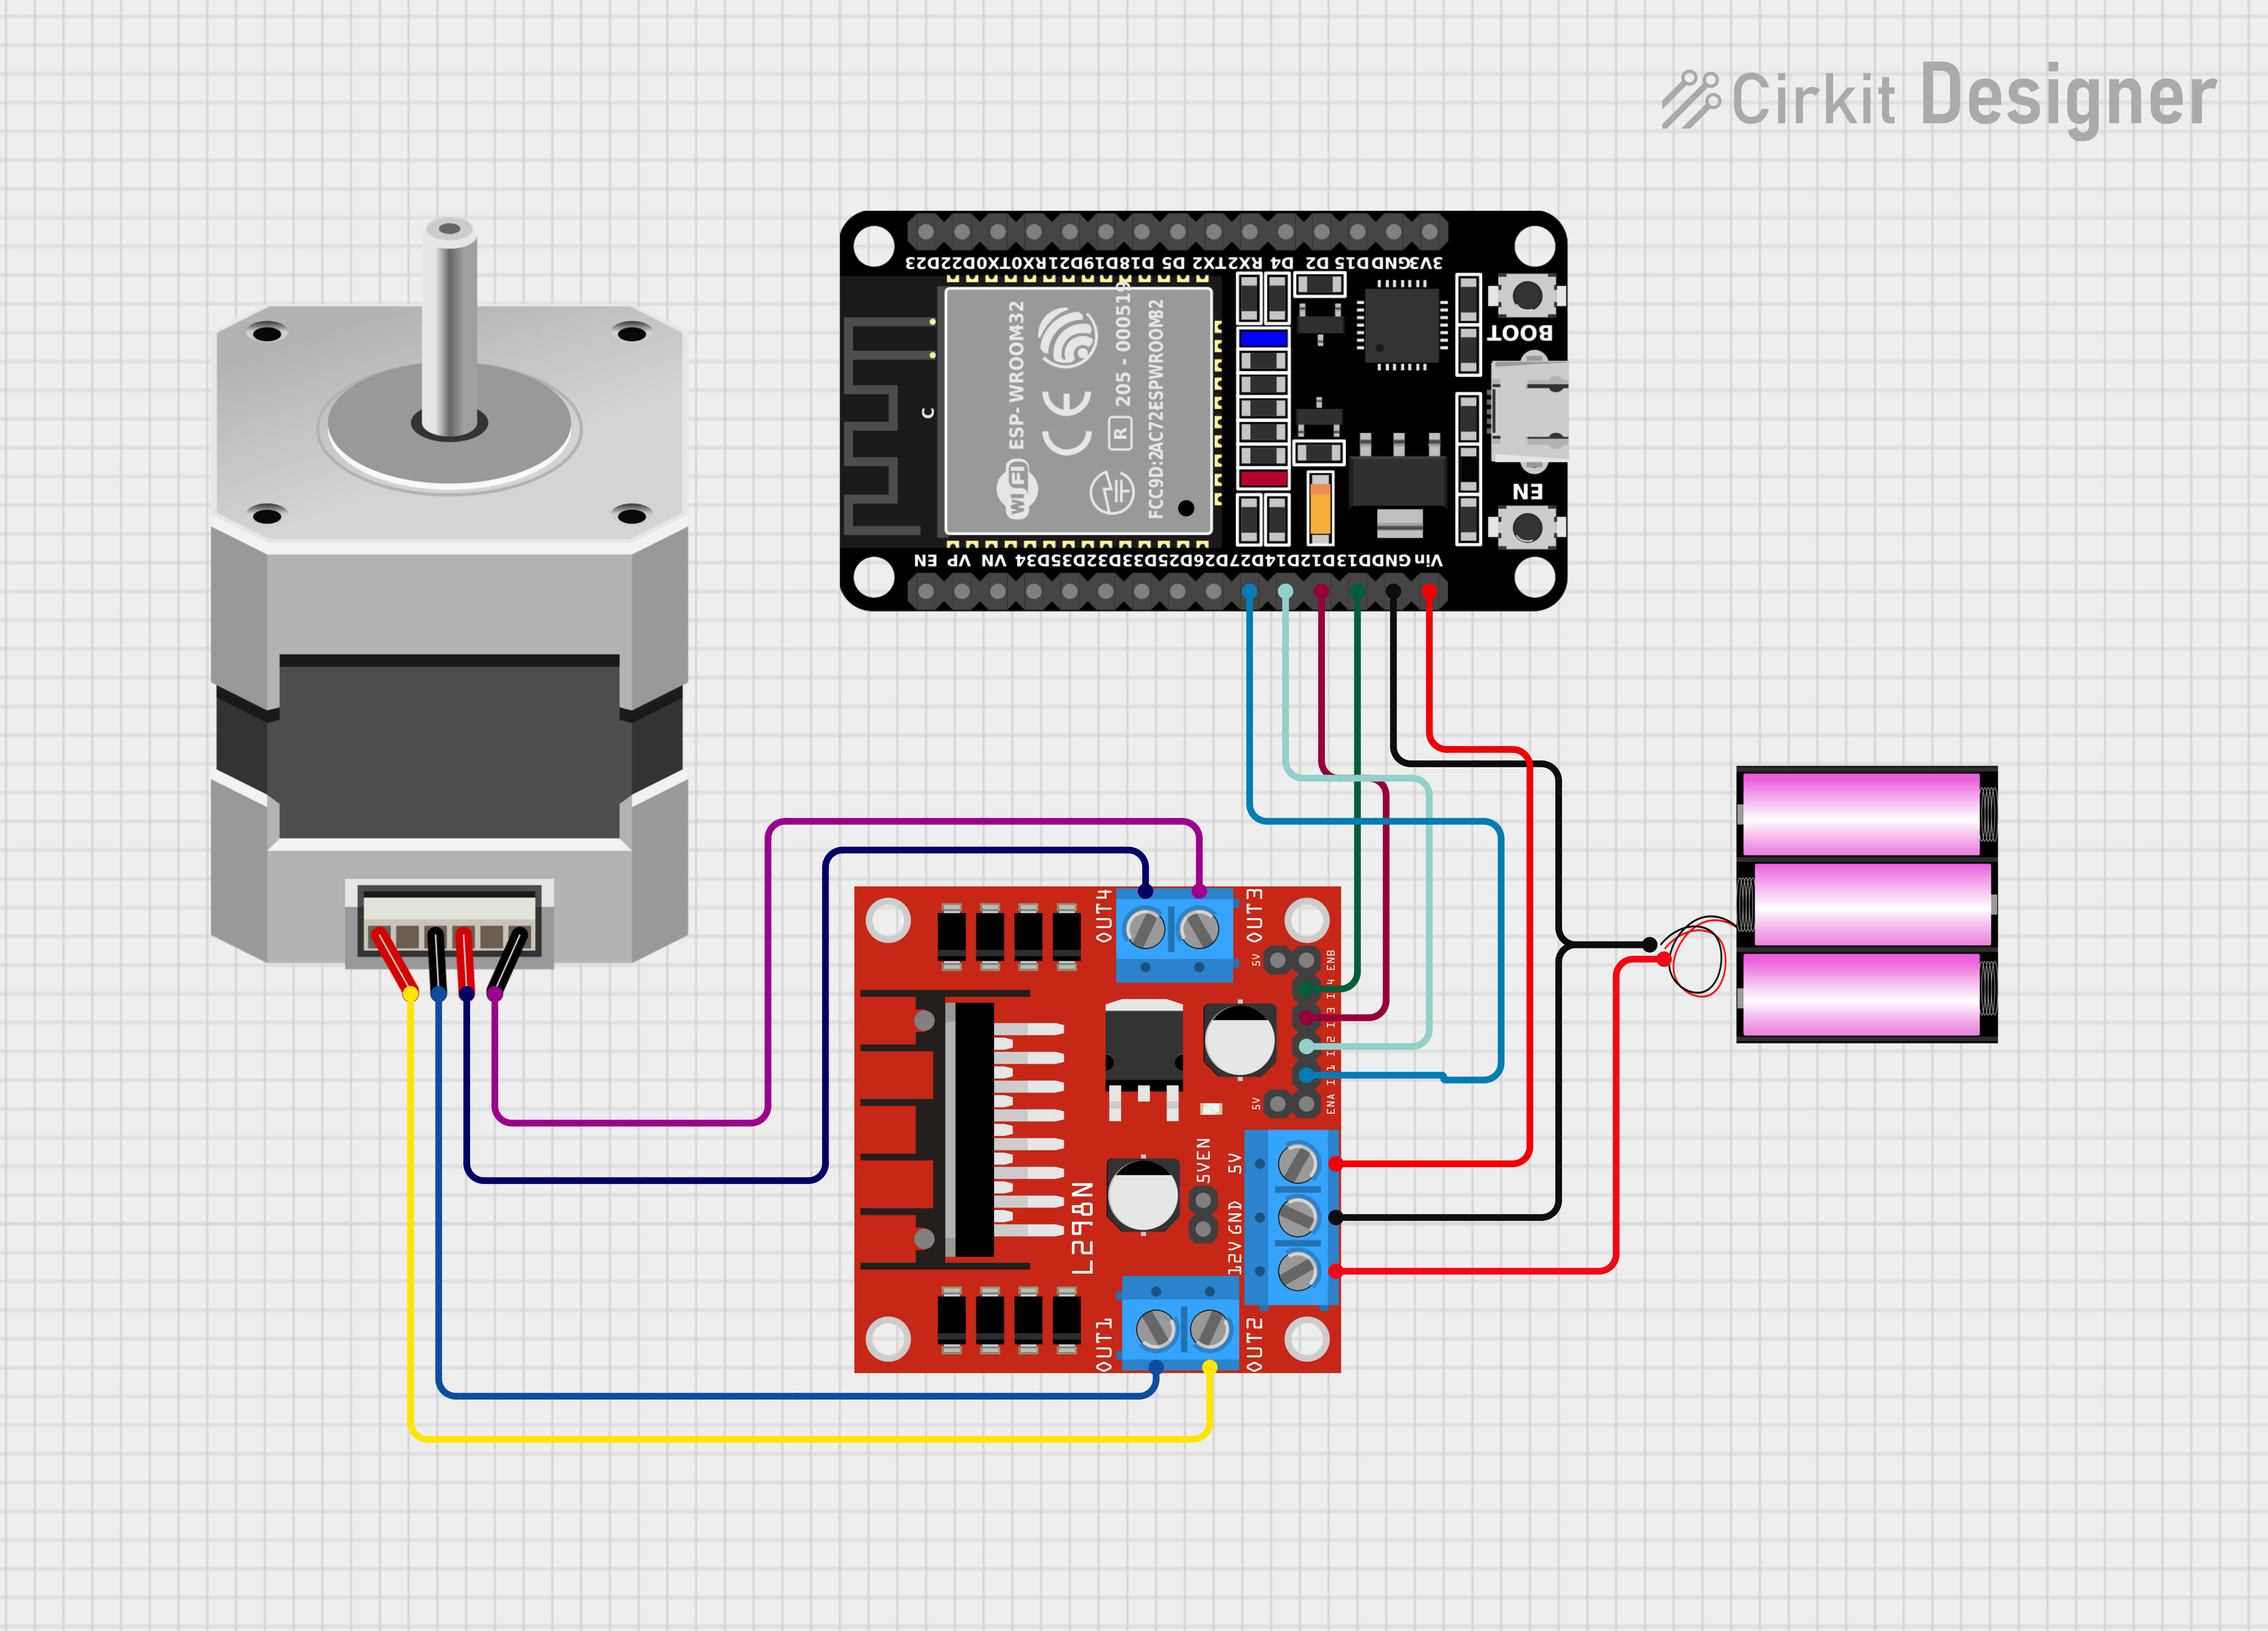
Interfacing Stepper Motor with ESP32 and L298N
- Hardware Setup:
- Connect the power supply to the L298N and ESP32.
- Connect the stepper motor leads to the L298N output pins.
- Connect the L298N control inputs to the ESP32 GPIO pins.
- Software Setup:
- Set up a development environment for the ESP32, such as Arduino IDE or PlatformIO.Install the necessary libraries for controlling stepper motors and interfacing with the L298N. For example, the Adafruit Motor Shield library can be used.Write your code to control the stepper motor. Here’s a basic example using the Adafruit Motor Shield library:
#include <Stepper.h>

const int stepsPerRevolution = 200;  // change this to fit the number of steps per revolution
// for your motor

// initialize the stepper library on pins 8 through 11:
Stepper myStepper(stepsPerRevolution, 12, 13, 14, 27);

void setup() {
  // set the speed at 60 rpm:
  myStepper.setSpeed(60);
  // initialize the serial port:
  Serial.begin(9600);
}

void loop() {
  // step one revolution  in one direction:
  Serial.println("clockwise");
  myStepper.step(stepsPerRevolution);
  delay(500);

  // step one revolution in the other direction:
  Serial.println("counterclockwise");
  myStepper.step(-stepsPerRevolution);
  delay(500);
}
Controlling the Stepper Motor
- Direction: To control the direction of rotation, set the
run()method toFORWARDorBACKWARD. - Speed: To adjust the speed, use the
setSpeed()method. - Steps: To control the number of steps, you can calculate the required pulse sequence based on the motor’s step angle and desired rotation.
Additional Considerations
- Heat dissipation: The L298N can generate heat, especially when driving high-current motors. Use a heat sink to dissipate the heat.
- Back EMF: When a stepper motor changes direction or stops abruptly, it can generate back EMF. Use flyback diodes to protect the L298N.
- Current limiting: To prevent excessive current draw, use current-limiting resistors in series with the motor windings.
- Noise reduction: The L298N can generate noise, which can affect the performance of other components. Consider using decoupling capacitors to reduce noise.
- Motor compatibility: Ensure that the stepper motor you’re using is compatible with the L298N’s drive capabilities.
- Power supply: Use a regulated power supply that can provide the required voltage and current for the L298N and stepper motor.
Conclusion
By following these steps and considering the additional factors, you can successfully interface a stepper motor with an ESP32 and L298N, enabling precise control and automation in various applications.


Leave a Reply
You must be logged in to post a comment.