

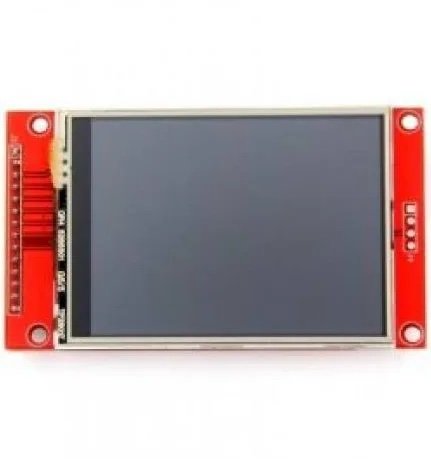
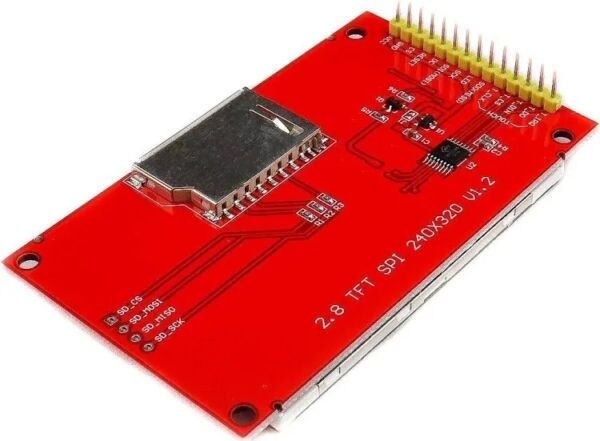
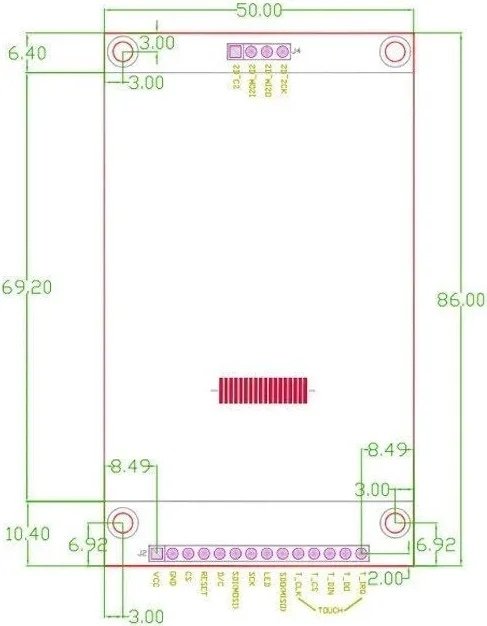
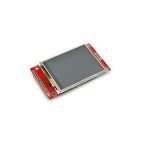
2.8 inch SPI Screen Module TFT Interface 240 x 320 without Touch

₹625.00 (incl GST)
₹529.66 (+18% GST extra)
TFT Touch Screen for Arduino
- Description
- How to Use, Learn more
- Reviews (0)
Description
2.8 Inch SPI Screen Module TFT Interface 240 x 320 Without Touch – High-Resolution Display for Your Projects
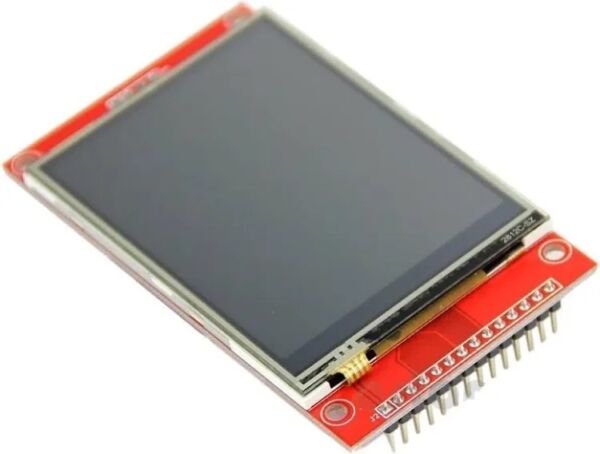
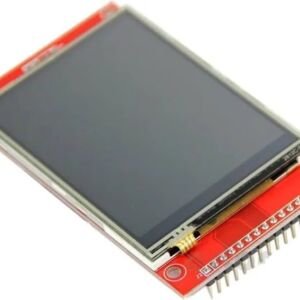
Enhance your electronic projects with this 2.8-inch SPI Screen Module, featuring a vibrant TFT interface and a high-resolution display of 240×320 pixels. Designed without touch functionality, this display is perfect for applications where precise visuals and simple integration are essential.
Key Features of the 2.8-Inch SPI Screen Module:
Big, Bright, and Colorful Display:
- With a 2.8-inch diagonal size, this module offers a bold and bright display for your projects.
- 240×320 RGB pixel resolution ensures clear and detailed visuals, significantly better than traditional black-and-white 128×64 screens.
Dual Operation Modes:
- 8-Bit Mode: Utilize 12 total lines (8 data lines + 4 control lines) for faster data transfer, making it suitable for high-performance applications.
- SPI Mode: Requires only 5 pins (SPI data in, data out, clock, select, and data/command), making it ideal for microcontrollers with limited pin availability.
Versatile and Easy to Use:
- Built with high-speed level shifters, the module is fully compatible with 3-5V microcontrollers, offering flexibility for a wide range of devices.
- The breakout board design allows quick and seamless connections, whether using SPI or 8-bit mode.
Onboard MicroSD Card Slot:
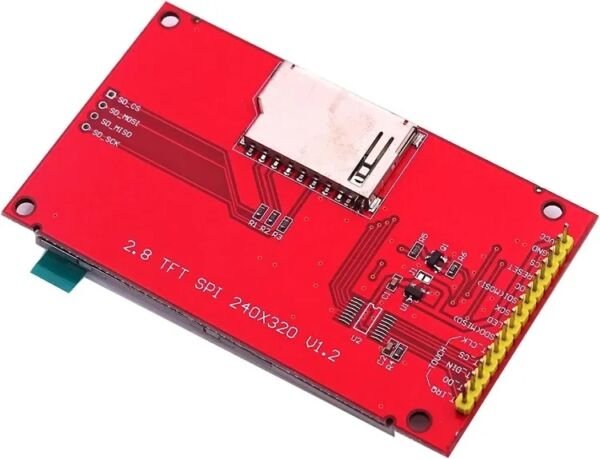
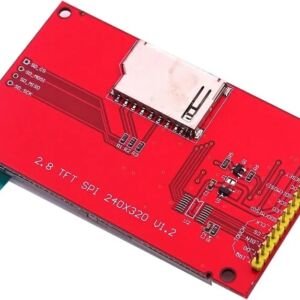
- In SPI mode, leverage the built-in MicroSD card socket to display images or load additional data, expanding the module’s functionality for multimedia projects.
Applications:
This 2.8-inch SPI screen module is ideal for:
- DIY electronics and robotics projects
- IoT interfaces and embedded systems
- Educational projects requiring vivid graphical displays
- Prototyping with microcontrollers like Arduino, Raspberry Pi, ESP32, and more
Specifications:
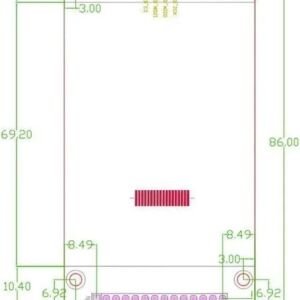
- Display Size: 2.8 inches (diagonal)
- Resolution: 240×320 pixels, RGB format
- Interface: SPI and 8-bit modes
- Voltage Compatibility: 3-5V
- Non-Touchscreen Module: Simplifies integration while maintaining high performance
Why Choose This 2.8-Inch TFT SPI Screen Module?
This 2.8-inch TFT interface module provides exceptional performance with its bright and colorful display, versatile connection options, and robust compatibility. Whether you’re designing an IoT dashboard, a compact graphical interface, or experimenting with microcontroller-based projects, this module delivers reliable and stunning results.
Upgrade Your Projects with a 2.8-Inch SPI Screen Module Today!
Bring your ideas to life with the perfect combination of vivid visuals, ease of use, and reliable performance.
Comprehensive Guide: Using the 2.8″ SPI ILI9341 TFT Display (Non-Touch) with Arduino Uno
⚠️ Critical Pre-Wiring Warning
- The Voltage Problem: The Arduino Uno operates on 5V logic, but the ILI9341 driver chip communicates using 3.3V logic.
- The Consequence: Connecting the data lines directly from the Uno to the display will cause the screen to overheat, glitch, or fail permanently.
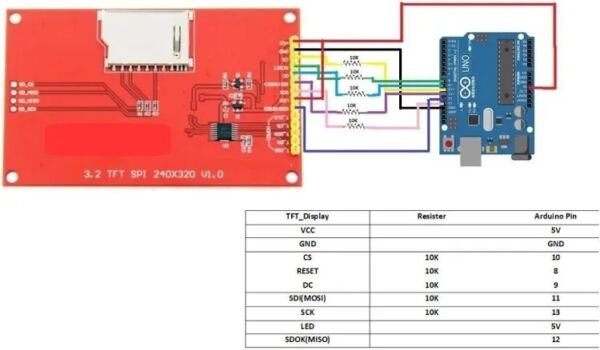
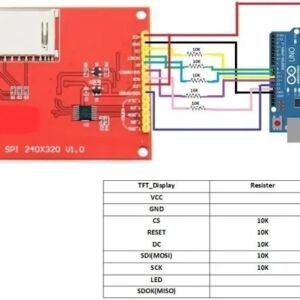
- The Fix: You must place a 1kΩ resistor inline (in series) on every data pin to drop the current and protect the display logic lines.
1. Pin Map & Hardware Connections
| Screen Pin Label [1, 2, 3, 4, 5] | Wire Treatment | Connect to Arduino Uno Pin | Purpose |
|---|---|---|---|
| VCC | Direct Wire (No Resistor) | 5V Pin | Powers the onboard 3.3V regulator |
| GND | Direct Wire (No Resistor) | GND Pin | Common Ground |
| CS | Through 1kΩ Resistor | Digital Pin 10 | Chip Select |
| RESET (RST) | Through 1kΩ Resistor | Digital Pin 8 | Screen Hardware Reset |
| DC / RS | Through 1kΩ Resistor | Digital Pin 9 | Data / Command Toggle |
| SDI (MOSI) | Through 1kΩ Resistor | Digital Pin 11 | SPI Data Line |
| SCK (CLK) | Through 1kΩ Resistor | Digital Pin 13 | SPI Clock Line |
| LED | Through 100Ω Resistor | 3.3V Pin | Backlight Power |
| MISO (SDO) | Leave Disconnected | Unused | Only needed to read data/SD cards |
2. Software Installation (Arduino IDE)
- Open your Arduino IDE.
- Go to Tools ➔ Manage Libraries… (or press
Ctrl + Shift + I). - In the search bar, type Adafruit ILI9341 and click Install.
- Next, search for Adafruit GFX Library and click Install.
- If a prompt asks to install dependencies (like Adafruit BusIO), select Install All. [6, 7, 8, 9]
3. Tested Reference Code
#include "SPI.h"
#include "Adafruit_GFX.h"
#include "Adafruit_ILI9341.h"
// Define the custom pins for Software (Bit-Banged) SPI
// Software SPI is highly reliable on the Uno and eliminates bus conflicts
#define TFT_CS 10
#define TFT_DC 9
#define TFT_RST 8
#define TFT_MOSI 11
#define TFT_CLK 13
// Instantiate the display constructor using Software SPI pins
Adafruit_ILI9341 tft = Adafruit_ILI9341(TFT_CS, TFT_DC, TFT_MOSI, TFT_CLK, TFT_RST, 12);
void setup() {
// Initialize the screen driver
tft.begin();
// Set Orientation: 0 = Portrait (240x320), 1 = Landscape (320x240)
tft.setRotation(1);
// Flash a solid background to wipe any boot-up noise
tft.fillScreen(ILI9341_BLACK);
}
void loop() {
// --- TEST 1: DISPLAY TEXT CHANNELS ---
tft.fillScreen(ILI9341_NAVY); // Deep Blue Background
// Print a Main Header Title
tft.setCursor(40, 40); // Coordinates (X, Y)
tft.setTextColor(ILI9341_YELLOW); // Text Color
tft.setTextSize(3); // Size Scale (1 is small, 3 is large)
tft.println("RYTRONICS.IN");
// Print a Subheading
tft.setCursor(40, 90);
tft.setTextColor(ILI9341_WHITE);
tft.setTextSize(2);
tft.println("ILI9341 Tutorial");
// Print Status with Background Color Block (Prevents Text Flickering)
tft.setCursor(40, 150);
// Syntax: setTextColor(TextColor, BackgroundColor)
tft.setTextColor(ILI9341_GREEN, ILI9341_NAVY);
tft.setTextSize(2);
tft.println("Status: SYSTEM OK");
delay(3000); // Hold layout for 3 seconds
// --- TEST 2: DISPLAY GEOMETRIC SHAPES ---
tft.fillScreen(ILI9341_BLACK); // Clear to Black
// 1. Draw a white hollow bounding border frame
// Parameters: drawRect(startX, startY, width, height, color)
tft.drawRect(5, 5, 310, 230, ILI9341_WHITE);
// 2. Draw a filled solid red rectangle block
// Parameters: fillRect(startX, startY, width, height, color)
tft.fillRect(30, 40, 80, 50, ILI9341_RED);
// 3. Draw a hollow cyan circle
// Parameters: drawCircle(centerX, centerY, radius, color)
tft.drawCircle(220, 70, 30, ILI9341_CYAN);
// 4. Draw a filled solid green circle
// Parameters: fillCircle(centerX, centerY, radius, color)
tft.fillCircle(220, 160, 25, ILI9341_GREEN);
// 5. Draw a simple diagonal line crossing the canvas
// Parameters: drawLine(startX, startY, endX, endY, color)
tft.drawLine(30, 180, 150, 180, ILI9341_MAGENTA);
delay(3000); // Hold geometry display for 3 seconds
}
4. Essential Troubleshooting Guide
- The Screen is Completely White: This means the screen is getting backlight power, but no data. Check if your
SDI (MOSI)andSCKwires are mixed up or plugged into the wrong pin rows on your breadboard. [11] - Text is Flickering Rapidly: If you update sensor data inside the
loop()function, do not usetft.fillScreen()right before writing the text. Instead, usetft.setTextColor(TEXT_COLOR, BACKGROUND_COLOR). This draws a solid block over the old numbers, wiping them cleanly without a visible flash. - Text Strings Mirror-Inverted or Upside Down: Change the value inside
tft.setRotation(1). Cycling through parameters0, 1, 2, or 3rotates the display driver matrix by 90-degree increments until it fits your casing design perfectly. [12]
Only logged in customers who have purchased this product may leave a review.


Reviews
There are no reviews yet.