

ESP32 with 1.3 inch OLED display
Introduction
The ESP32 with 1.3 inch OLED display is one of the most popular combinations in IoT and embedded electronics projects. The ESP32 offers built-in Wi-Fi and Bluetooth, while the OLED display provides a compact, low-power, and high-contrast output interface.
In this guide, you will learn how to connect a 1.3-inch OLED display to ESP32, understand the I2C communication process, explore required libraries, and discover real-world project applications.
Why Use a 1.3 Inch OLED Display with ESP32?
Using a 1.3 inch OLED display with ESP32 has several advantages:
- Low power consumption (ideal for IoT devices)
- High resolution and sharp contrast
- No backlight required
- Easy I2C interface using only two pins
- Perfect for compact and portable projects
Compared to 0.96-inch OLEDs, the 1.3-inch OLED offers better readability and a larger display area.
Components Required
To connect ESP32 with OLED display, you need:
- ESP32 Development Board
- 1.3 Inch OLED Display (I2C, 128×64)
- Jumper wires
- Breadboard (optional)
- USB cable
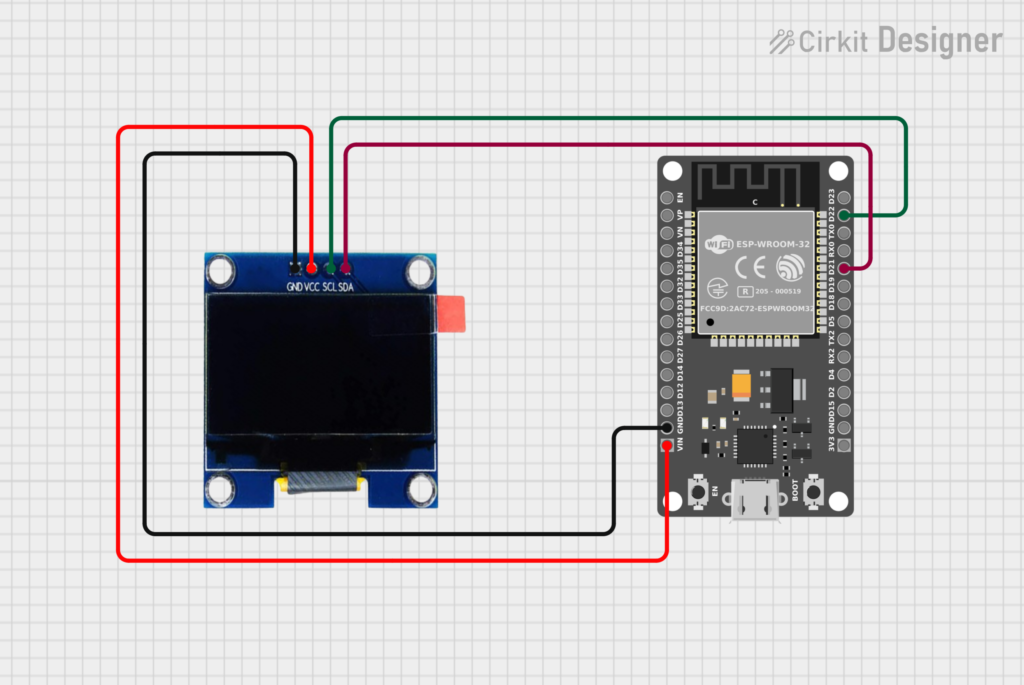
1.3 Inch OLED Display Pin Configuration
Most 1.3 inch OLED I2C displays have four pins:
| OLED Pin | Description |
|---|---|
| VCC | Power supply (3.3V recommended) |
| GND | Ground |
| SCL | I2C Clock |
| SDA | I2C Data |
ESP32 OLED I2C Connection Diagram
Standard ESP32 I2C pins:
| OLED Pin | ESP32 Pin |
|---|---|
| VCC | 3.3V |
| GND | GND |
| SCL | GPIO 22 |
| SDA | GPIO 21 |
ESP32 I2C pins can be changed, but GPIO 21 (SDA) and GPIO 22 (SCL) are the default and most stable.
How ESP32 Communicates with OLED Display
The ESP32 OLED I2C communication works as follows:
- ESP32 initializes I2C protocol
- OLED display responds with its I2C address (commonly
0x3C) - ESP32 sends text or pixel data
- OLED displays real-time information
This method is fast, efficient, and reliable for IoT projects.
ESP32 OLED Libraries (Best for SEO & Performance)
Use these popular Arduino libraries:
- Adafruit SSD1306
- Adafruit GFX Library
- U8g2 Library (Advanced graphics)
These libraries support:
- Text rendering
- Icons and shapes
- Animations
- Multi-screen pages
Advantages of ESP32 OLED Projects
- Improves user interface
- Professional project appearance
- Real-time feedback
- Compact and lightweight design
- Ideal for academic and commercial projects
Common Problems & Troubleshooting
- OLED not displaying → Check I2C address
- Flickering screen → Use short wires
- No response → Verify SDA/SCL pins
- Dim display → Ensure proper voltage
ESP32 OLED Project Ideas (High Search Volume)
- ESP32 Wi-Fi signal strength monitor
- Smart weather station with OLED
- ESP32 IoT dashboard display
- Digital notice board using ESP32
- Battery voltage monitor with OLED
Conclusion
Using a 1.3 inch OLED display with ESP32 is one of the best ways to enhance your embedded and IoT projects. The setup is simple, power-efficient, and visually impressive. Whether you are a student, hobbyist, or engineer, mastering ESP32 OLED I2C interfacing will greatly improve your project quality and presentation.
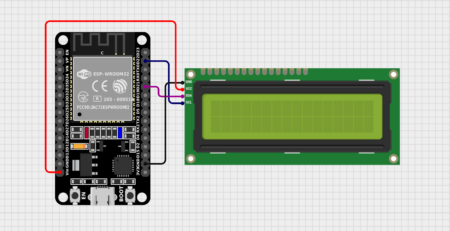
Circuit Diagram
Complete Code – ESP32 with 1.3 inch OLED display
#include <Arduino.h>
#include <U8x8lib.h>

#ifdef U8X8_HAVE_HW_I2C
#include <Wire.h>
#endif

// Constructor for SSD1306 128x64 OLED (I2C)
U8X8_SSD1306_128X64_NONAME_HW_I2C u8x8(/* reset=*/ U8X8_PIN_NONE);

void setup() {
  u8x8.begin();
  u8x8.clear();

  // Choose font
  u8x8.setFont(u8x8_font_chroma48medium8_r);

  // Set cursor position (col, row)
  u8x8.setCursor(2, 3);

  // Print message
  u8x8.print("Hello AKASH & HARSH");
  // u8x8.draw2x2String(0, 5, "Scale U");
}

void loop() {
  // Empty loop, nothing else needed
}Frequently Asked Questions (SEO Boost)
Can ESP32 run OLED on 3.3V?
Yes, most 1.3 inch OLED displays work perfectly on 3.3V with ESP32.
What is the I2C address of 1.3 inch OLED?
Most displays use 0x3C, but some may use 0x3D.
Is OLED better than LCD for ESP32?
Yes, OLED offers better contrast, lower power usage, and simpler wiring.
Can ESP32 show graphics on OLED?
Yes, using Adafruit GFX or U8g2 libraries.

Leave a Reply
You must be logged in to post a comment.