

ESP32 with ZMPT101B Voltage Sensor – Complete AC Voltage Measurement Guide (2026)
Introduction
Measuring AC voltage using ESP32 is a common requirement in IoT, energy monitoring, and automation projects. In this guide, we explain how to use the ZMPT101B AC voltage sensor with ESP32 to accurately measure AC voltage measurement with ESP32 using Arduino IDE. This tutorial is ideal for students, hobbyists, and IoT learners in India working on real-world electronics projects.
Understanding AC voltage measurement with ESP32 can greatly enhance your IoT projects.
👨🎓 Who Should Use This Project?
This project showcases the practical applications of AC voltage measurement with ESP32.
This ESP32 AC voltage measurement project is ideal for:
Understanding AC voltage measurement with ESP32 is crucial for future innovations in IoT.
AC voltage measurement with ESP32 not only offers educational benefits but also practical applications.
Learning about AC voltage measurement with ESP32 can empower makers and engineers alike.
The future of monitoring systems involves AC voltage measurement with ESP32.
- Electronics & IoT students
- Engineering & diploma projects
- Smart energy monitoring systems
- Home automation applications
- ESP32 beginners using Arduino IDE
Professionals are increasingly adopting AC voltage measurement with ESP32 in their designs.
What Parts Required ?
What is ZMPT101B Voltage Sensor?
The ZMPT101B is a high-precision AC voltage sensor module based on a voltage transformer. It is designed to measure single-phase AC voltage while providing electrical isolation between high-voltage and low-voltage circuits.
Key Features
- Measures AC voltage up to 250V
- High accuracy and good linearity
- On-board adjustable potentiometer
- Electrical isolation for safety
- Analog output compatible with microcontrollers
Why Use ESP32 with ZMPT101B?
The ESP32 is a powerful microcontroller with built-in Wi-Fi and Bluetooth, making it ideal for IoT-based voltage monitoring systems.
Mastering AC voltage measurement with ESP32 can lead to groundbreaking IoT solutions.
Advantages of ESP32
Innovation often starts with projects like AC voltage measurement with ESP32.
AC voltage measurement with ESP32 has become a vital skill for modern engineers.
- Dual-core processor
- High-resolution ADC
- Low power consumption
- Wi-Fi & Bluetooth connectivity
- Suitable for real-time cloud monitoring
Combining ESP32 with ZMPT101B enables safe, wireless, and real-time AC voltage measurement.
Working Principle
The ZMPT101B uses a miniature voltage transformer to step down high AC voltage to a safe, low-level signal. This signal is then processed through an onboard operational amplifier.
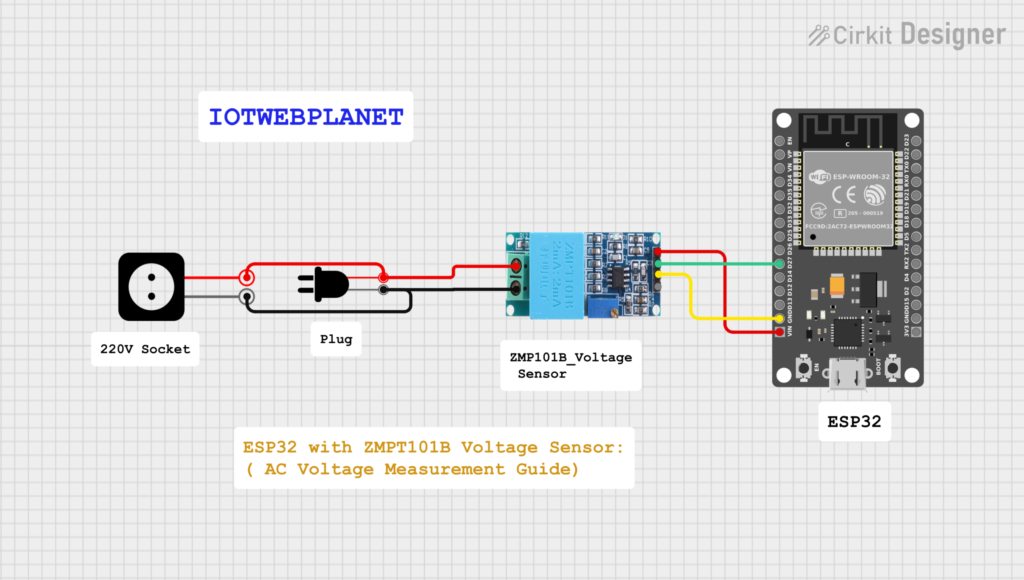
- AC mains voltage is applied to the sensor input
- Voltage transformer isolates and scales down the voltage
- Analog output is sent to ESP32 ADC pin
- ESP32 processes and converts analog data into RMS voltage
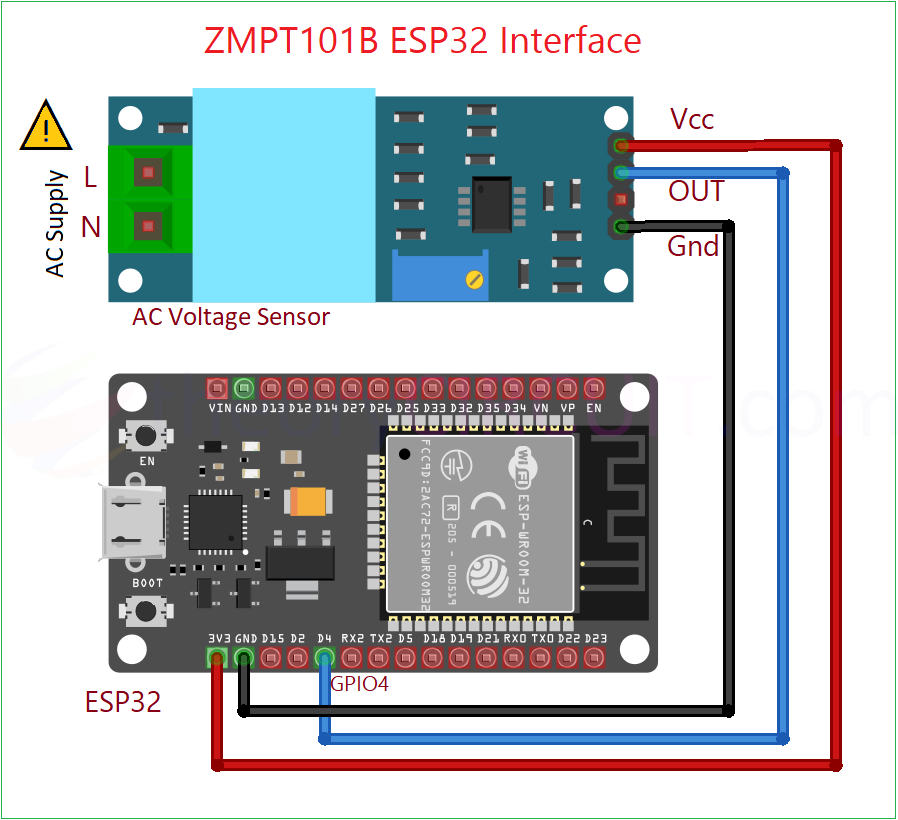
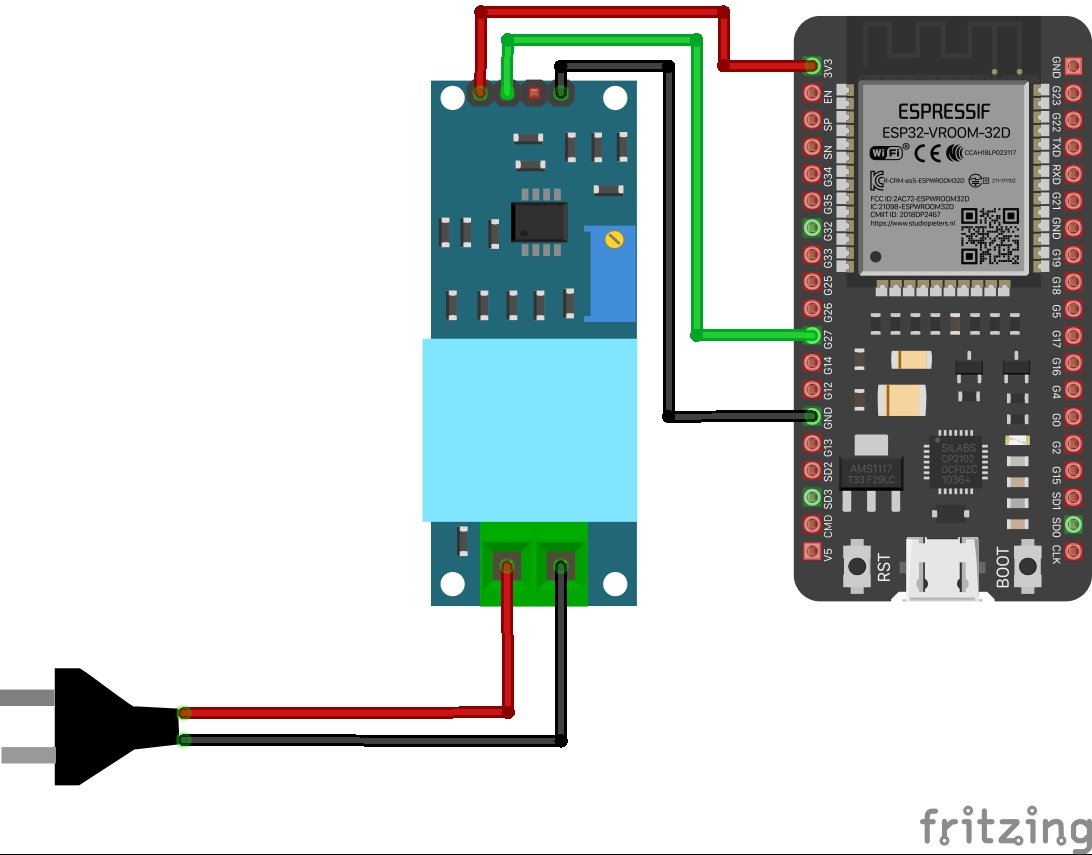
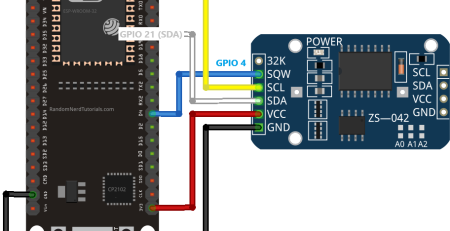
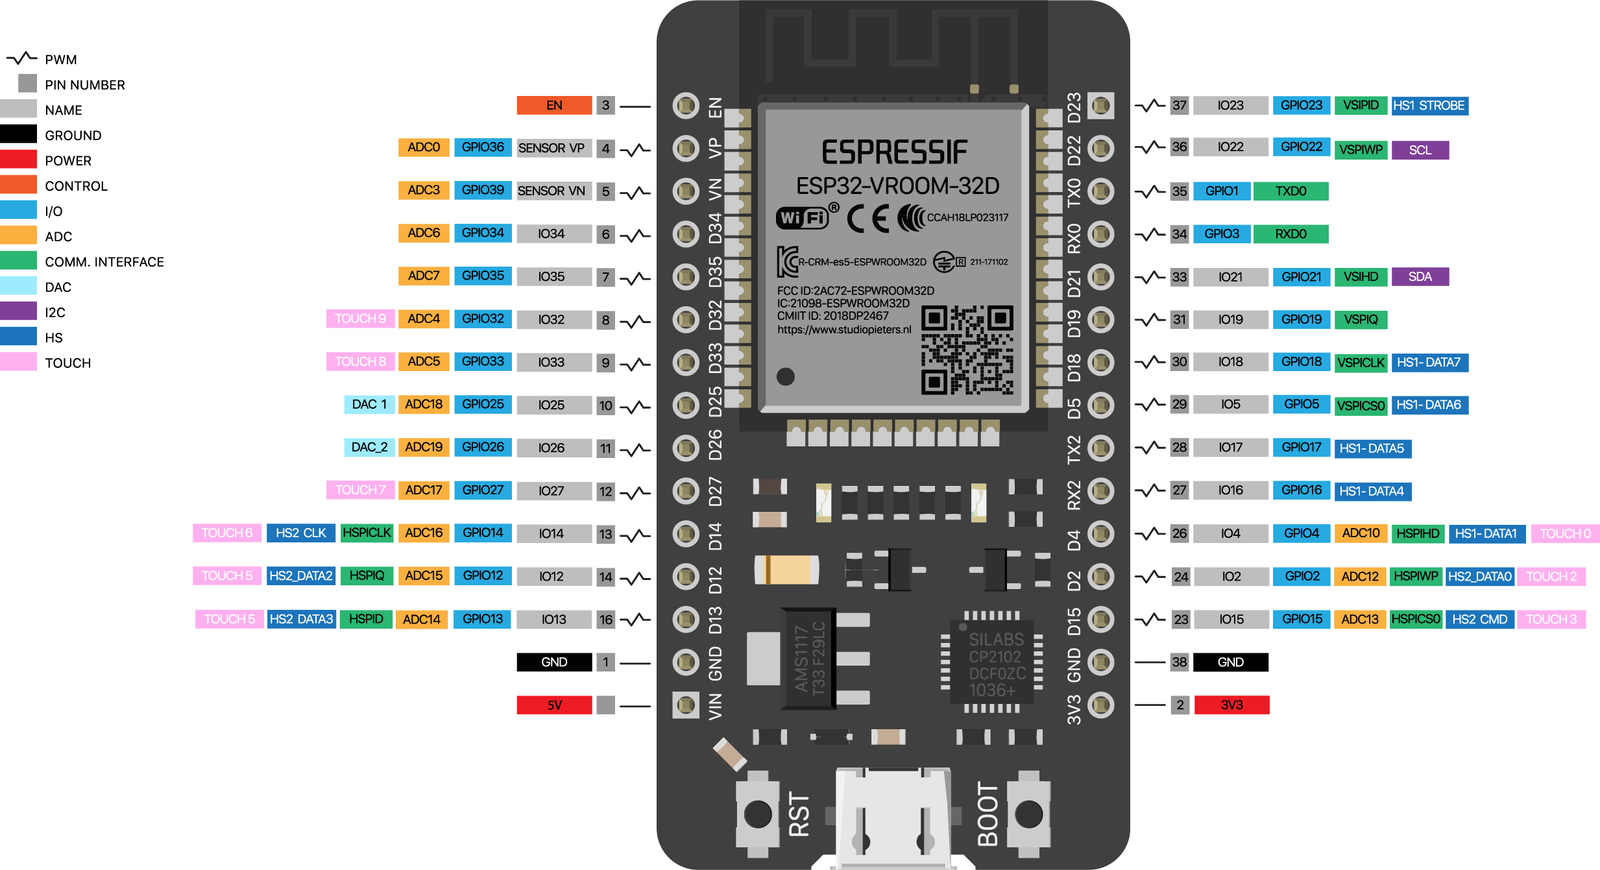
ESP32 and ZMPT101B Pin Connections
ZMPT101B Pins
- VCC → 3.3V or 5V
- GND → Ground
- OUT → ESP32 ADC pin (GPIO 34, 35, or 32 recommended)
Example Connection
| ZMPT101B | ESP32 |
|---|---|
| VCC | 3.3V |
| GND | GND |
| OUT | GPIO 34 |
AC voltage measurement with ESP32 can be the key to unlocking new IoT advancements.
⚠️ Safety Note: Always use proper insulation and precautions when dealing with AC mains voltage.
ESP32 ADC Reading & Voltage Calculation
The ESP32 reads the analog signal from ZMPT101B using its ADC. Since AC voltage fluctuates, multiple samples are taken to calculate the RMS (Root Mean Square) voltage, which represents the actual usable voltage.
Key Steps
- Read analog samples
- Find peak-to-peak value
- Convert ADC values to voltage
- Calculate RMS voltage
- Calibration is crucial for accurate voltage measurement.
Calibration Steps
- Apply a known AC voltage (e.g., 230V)
- Adjust the onboard potentiometer
- Compare readings with a multimeter
- Fine-tune in software if required
Proper calibration ensures high accuracy and stability.
Applications
The ESP32 + ZMPT101B combination is widely used in:
- Smart energy meters
- Home automation systems
- Power monitoring dashboards
- IoT-based electricity monitoring
- Over/under voltage protection systems
- Industrial power analysis
Advantages of This Setup
- Safe electrical isolation
- Low-cost solution
- Wireless monitoring via Wi-Fi
- High accuracy after calibration
- Compact and scalable design
Incorporating AC voltage measurement with ESP32 into your projects enhances their value.
Limitations
- Measures only AC voltage (not current)
- Needs calibration for precise readings
- ESP32 ADC can be noisy (software filtering recommended)
Through AC voltage measurement with ESP32, we can achieve smarter energy solutions.
Conclusion
Using the ESP32 with ZMPT101B Voltage Sensor is an excellent approach for building smart AC voltage monitoring systems. The combination offers safety, accuracy, and IoT capabilities, making it ideal for both hobbyists and industrial projects.
With proper calibration and signal processing, this setup can be transformed into a professional-grade energy monitoring solution.
Arduino IDE Code For ZMPT101B Voltage Sensor With Esp32
Implementing AC voltage measurement with ESP32 can greatly benefit energy efficiency.
/**
 * This program shows you how to use the basics of this library.
*/

#include <ZMPT101B.h> //https://github.com/Abdurraziq/ZMPT101B-arduino

#define SENSITIVITY 500.0f

// ZMPT101B sensor output connected to analog pin A0
// and the voltage source frequency is 50 Hz.
ZMPT101B voltageSensor(34, 50.0);

void setup() {
  Serial.begin(115200);
  // Change the sensitivity value based on value you got from the calibrate
  // example.
  voltageSensor.setSensitivity(SENSITIVITY);
}

void loop() {
  // read the voltage and then print via Serial.
  float voltage = voltageSensor.getRmsVoltage();
  Serial.println(voltage);

  delay(1000);
}
This project is commonly taught in practical IoT training programs using ESP32.
The insights from AC voltage measurement with ESP32 can influence future technology.
❓ Frequently Asked Questions
Explore the benefits of AC voltage measurement with ESP32 in your DIY projects.
Is ZMPT101B safe to use with ESP32?
Yes, ZMPT101B provides isolation for AC voltage measurement, but proper wiring and calibration are essential.
Can ESP32 measure AC voltage directly?
No. ESP32 measures analog voltage. Sensors like ZMPT101B convert AC voltage into a measurable signal.
Which IDE is used for this project?
This project uses Arduino IDE for ESP32 programming.
Is this project suitable for students?
Yes, it is ideal for college projects, IoT learning, and practical electronics training.
By mastering AC voltage measurement with ESP32, you can develop advanced monitoring systems.
Many enthusiasts are leveraging AC voltage measurement with ESP32 to optimize their home automation.
Students can learn a lot from hands-on projects like AC voltage measurement with ESP32.
AC voltage measurement with ESP32 can help you create more efficient systems.
Utilizing AC voltage measurement with ESP32 allows for real-time monitoring.
Consider how AC voltage measurement with ESP32 can impact your design choices.
AC voltage measurement with ESP32 opens up new possibilities in automation.


Leave a Reply
You must be logged in to post a comment.