

12Dec
ESP32 Setup in Arduino IDE
ESP32 Board are so popular? Mainly because of the following features
- Low-cost
- Bluetooth
- WiFi
- Low Power
- Dual Core
- High GPIO PIN
- Compatiblity
- Multiple Language support
Setup ESP32 with Arduino IDE
To be able to program the ESP32 using Arduino IDE, you need to add support for the ESP32 boards. Follow the next steps:
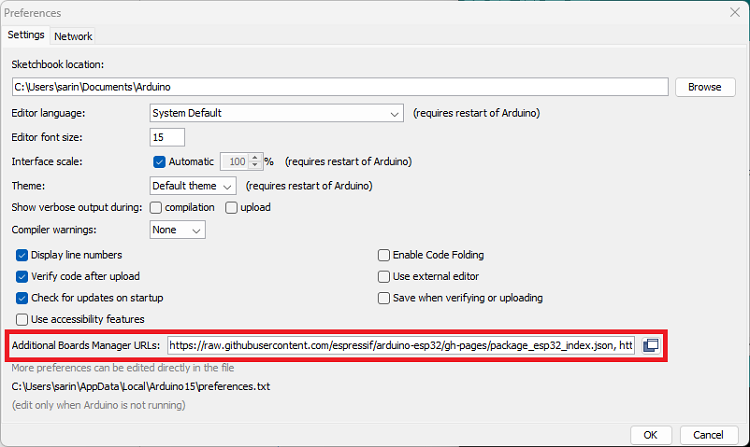
Go to File > Preferences.

Enter the following into the “Additional Board Manager URLs” field. This will add support for ESP32 and ESP8266 boards as well.
https://raw.githubusercontent.com/espressif/arduino-esp32/gh-pages/package_esp32_index.json,
http://arduino.esp8266.com/stable/package_esp8266com_index.json
See the figure below. Then, click the “OK” button.
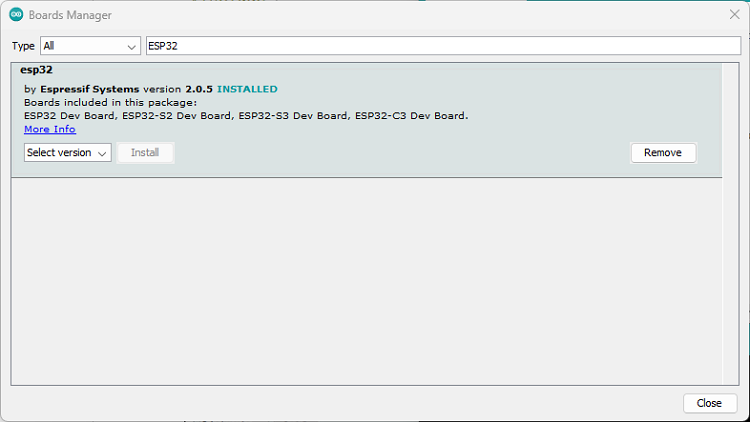
- Open the Boards Manager. Go to Tools > Board >Boards Manager…
- Search for ESP32 and install the “ESP32 by Espressif Systems“:
- That’s it. It will be installed after a few seconds.
After this, restart your Arduino IDE.
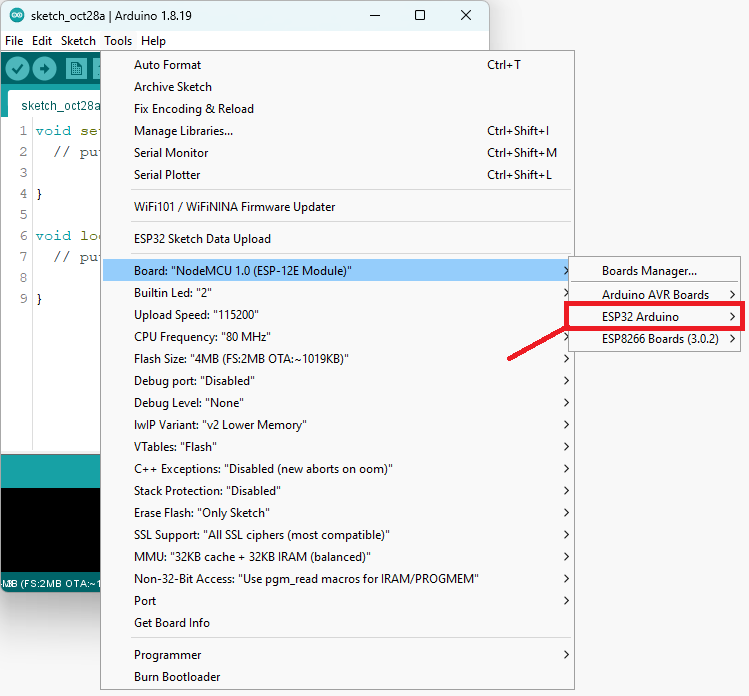
Then, go to Tools > Board and check that you have ESP32 boards available.
Now, you’re ready to start programming your ESP32 using Arduino IDE.
Now you are ready to start coding in Arduino IDE for ESP32 Programming.

Leave a Reply
You must be logged in to post a comment.