

Node MCU ESP8266 Setup in Arduino IDE
- 18-01-2024
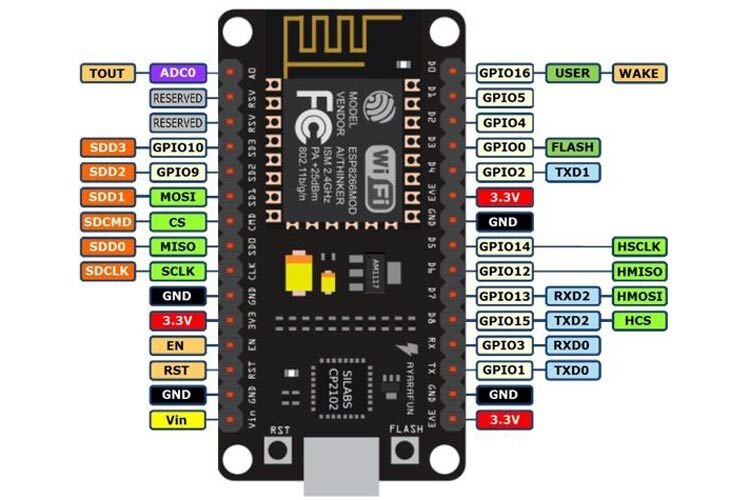
Node MCU ESP8266 Board are so popular? Mainly because of the following features.
Its true Arduino Killer
- Low-cost
- WiFi
- Low Power
- High GPIO PIN
- Compatiblity
- Multiple Language support
Main Differences Between ESP8266 and ESP32
There is a successor of the ESP8266—the ESP32. The ESP32 combines Wi-Fi and Bluetooth and is dual-core. If you want to start with any of these boards, we recommend getting an ESP32. If you already have an ESP8266, don’t worry. It works great, it has a huge community and it does the job for most DIY IoT projects.
Setup ESP8266 with Arduino IDE
To be able to program the ESP32 using Arduino IDE, you need to add support for the ESP32 boards. Follow the next steps:
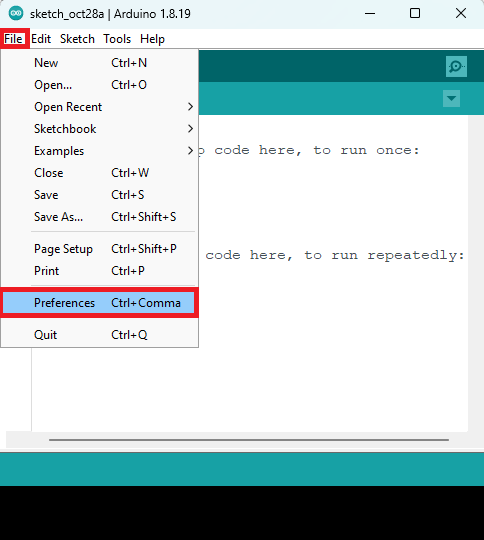
Go to File > Preferences.
Enter the following into the “Additional Board Manager URLs” field. This will add support for ESP32 and ESP8266 boards as well
http://arduino.esp8266.com/stable/package_esp8266com_index.json
See the figure below. Then, click the “OK” button.
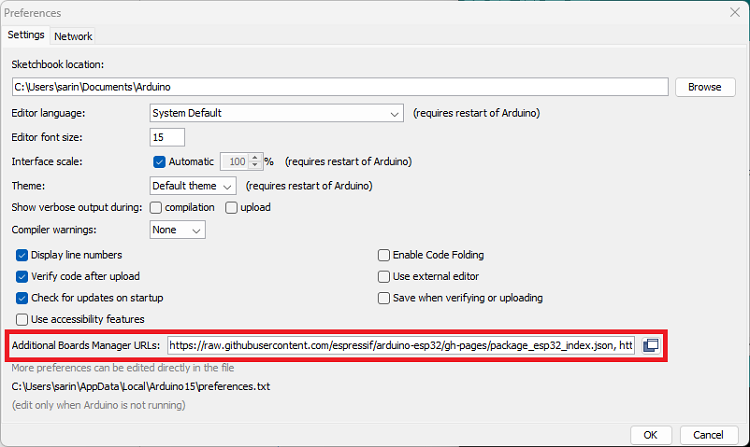
Note: if you already have the ESP32 boards URL, you can separate the URLs with a comma as follows:
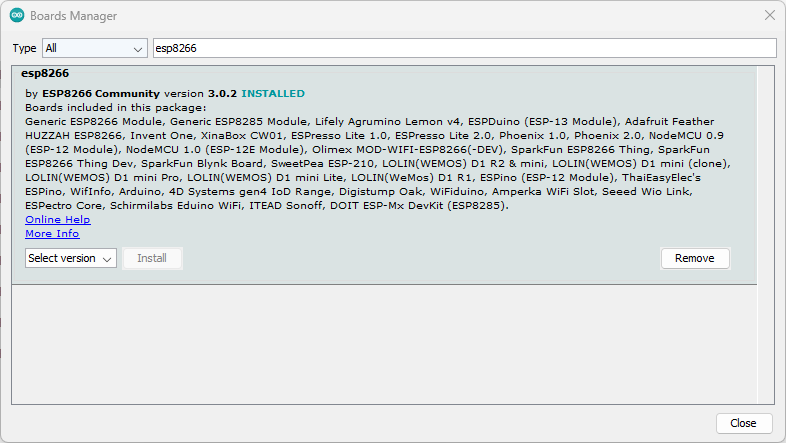
- Search for ESP8266 and install the “ESP8266 by ESP8266 Community“.
- That’s it. It will be installed after a few seconds.
After this, restart your Arduino IDE.
Then, go to Tools > Board and check that you have ESP8266 boards available.
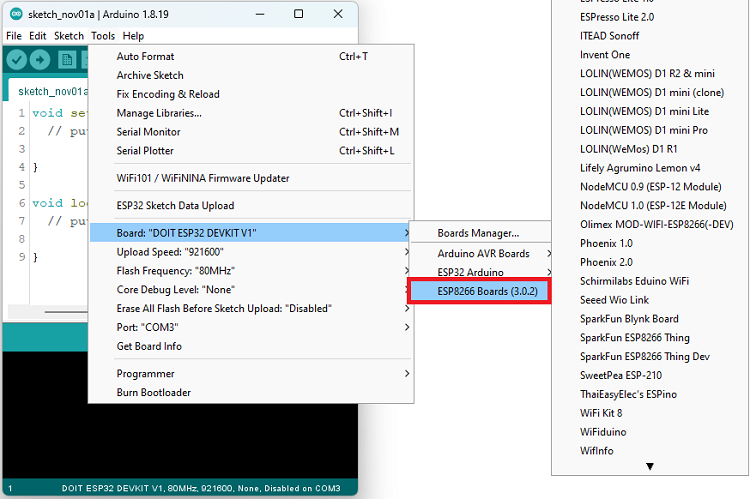
Now, you’re ready to start programming your ESP8266 using Arduino IDE.
Now you are ready to start coding in Arduino IDE for ESP8266 Programming.


Leave a Reply
You must be logged in to post a comment.