

ESP32 Telegram Bot LED Control: Turn LED ON and OFF Using Telegram
ESP32 Telegram Bot LED Control Using Telegram
Want to control an LED from anywhere using your smartphone? In this project, we will build an ESP32 Telegram Bot LED Control system that allows you to turn an LED ON and OFF remotely using Telegram commands.
The ESP32 connects to a Wi-Fi network and communicates with a Telegram Bot using the Telegram Bot API. Once connected, you can send commands such as /on, /off, and /status from Telegram.
This is a simple but powerful IoT project using ESP32 and Telegram and can be extended to control relays, lights, fans, appliances, sensors, motors, and complete home automation systems.
What You Will Learn
After completing this project, you will learn:
- How to create a Telegram Bot
- How to obtain a Telegram Bot Token
- How to find your Telegram Chat ID
- How to connect ESP32 to Wi-Fi
- How to connect ESP32 with Telegram
- How to control an LED using Telegram commands
- How to check the LED status remotely
- How to create a basic IoT control system
- How to troubleshoot common Telegram bot problems
How the ESP32 Telegram Bot Works
The project uses the following communication process:
Smartphone → Telegram → Telegram Bot → Internet → ESP32 → LED
The ESP32 connects to your Wi-Fi network. It continuously checks the Telegram Bot for new messages.
For example:
/on
Telegram sends the command to the bot.
The ESP32 receives the command and executes:
digitalWrite(LED_PIN, HIGH);
The LED turns ON and the bot replies:
💡 LED is ON
Similarly, when you send:
/off
The ESP32 executes:
digitalWrite(LED_PIN, LOW);
The LED turns OFF.
Components Required
| Component | Quantity |
|---|---|
| ESP32 Development Board | 1 |
| LED | 1 |
| 220Ω Resistor | 1 |
| Breadboard | 1 |
| Jumper Wires | As required |
| USB Cable | 1 |
| Wi-Fi Network | 1 |
| Smartphone with Telegram | 1 |
You can also use the built-in LED of the ESP32, depending on your board.
Circuit Diagram and Wiring
For this example, we are using GPIO 2.
External LED Connection
| ESP32 | LED |
|---|---|
| GPIO 2 | LED Anode (+) |
| GND | LED Cathode (-) through 220Ω resistor |
The resistor should be connected in series with the LED to limit current.
Simple Connection
ESP32 GPIO 2
     |
     |
   220Ω
     |
     |
    LED
     |
     |
    GND
If your ESP32 board has a built-in LED connected to GPIO 2, you can test the project without an external LED.
Step 1: Create a Telegram Bot
First, open Telegram on your smartphone or computer.
Search for:
BotFather
BotFather is Telegram’s official bot-management interface.
Send:
/start
Then send:
/newbot
Telegram will ask you for a bot name.
For example:
ESP32 LED Controller
Next, choose a username ending with bot.
Example:
ESP32_LED_Controller_bot
BotFather will provide a Bot Token.
It will look similar to:
1234567890:AAxxxxxxxxxxxxxxxxxxxxxxxxxxxx
Keep this token private.
Step 2: Get Your Telegram Chat ID
Search for a Telegram bot that can provide your Chat ID, or use a small Telegram API method to retrieve the ID after sending a message to your bot.
Your Chat ID may look similar to:
123456789
You will use this value in the Arduino code.
Important: Do not publish your real Bot Token or personal Chat ID in a public GitHub repository.
Step 3: Install the Required Arduino Libraries
Open:
Arduino IDE → Library Manager
Install:
UniversalTelegramBot
Search for:
UniversalTelegramBot
Also make sure your ESP32 board package is installed.
The project uses:
#include <WiFi.h>
#include <WiFiClientSecure.h>
#include <UniversalTelegramBot.h>
Step 4: Configure Wi-Fi and Telegram
Replace these values:
const char* ssid = "YOUR_WIFI_NAME";
const char* password = "YOUR_WIFI_PASSWORD";
#define BOT_TOKEN "YOUR_BOT_TOKEN"
#define CHAT_ID "YOUR_CHAT_ID"
For example:
const char* ssid = "MyWiFi";
const char* password = "MyPassword123";
#define BOT_TOKEN "1234567890:AAxxxxxxxxxxxxxxxx"
#define CHAT_ID "123456789";
Never share your actual password or Bot Token publicly.
Complete ESP32 Telegram LED Control Code
#include <WiFi.h>
#include <WiFiClientSecure.h>
#include <UniversalTelegramBot.h>
// ---------- WiFi ----------
const char* ssid = "YOUR_WIFI_NAME";
const char* password = "YOUR_WIFI_PASSWORD";
// ---------- Telegram ----------
#define BOT_TOKEN "YOUR_BOT_TOKEN"
#define CHAT_ID "YOUR_CHAT_ID"
WiFiClientSecure client;
UniversalTelegramBot bot(BOT_TOKEN, client);
// ---------- LED ----------
#define LED_PIN 2
// Check Telegram every 1 second
unsigned long lastTime = 0;
const unsigned long interval = 1000;
void handleNewMessages(int numNewMessages) {
for (int i = 0; i < numNewMessages; i++) {
String chat_id = bot.messages[i].chat_id;
String text = bot.messages[i].text;
Serial.println("Message: " + text);
// Check Chat ID
if (chat_id != CHAT_ID) {
bot.sendMessage(chat_id, "Unauthorized user!", "");
continue;
}
// LED ON
if (text == "/on") {
digitalWrite(LED_PIN, HIGH);
bot.sendMessage(chat_id, "💡 LED is ON", "");
}
// LED OFF
else if (text == "/off") {
digitalWrite(LED_PIN, LOW);
bot.sendMessage(chat_id, "🔴 LED is OFF", "");
}
// Status
else if (text == "/status") {
if (digitalRead(LED_PIN)) {
bot.sendMessage(chat_id, "LED Status: ON", "");
}
else {
bot.sendMessage(chat_id, "LED Status: OFF", "");
}
}
// Help
else if (text == "/start") {
String message = "ESP32 LED Control\n\n";
message += "/on - Turn LED ON\n";
message += "/off - Turn LED OFF\n";
message += "/status - Check LED status";
bot.sendMessage(chat_id, message, "");
}
// Unknown command
else {
bot.sendMessage(
chat_id,
"Unknown command.\nUse /on, /off or /status",
""
);
}
}
}
void setup() {
Serial.begin(115200);
pinMode(LED_PIN, OUTPUT);
digitalWrite(LED_PIN, LOW);
// Connect WiFi
WiFi.begin(ssid, password);
Serial.print("Connecting to WiFi");
while (WiFi.status() != WL_CONNECTED) {
delay(500);
Serial.print(".");
}
Serial.println();
Serial.println("WiFi Connected!");
Serial.print("IP Address: ");
Serial.println(WiFi.localIP());
// Telegram requires secure connection
client.setInsecure();
Serial.println("Telegram Bot Ready!");
}
void loop() {
if (millis() - lastTime > interval) {
int numNewMessages =
bot.getUpdates(bot.last_message_received + 1);
while (numNewMessages) {
handleNewMessages(numNewMessages);
numNewMessages =
bot.getUpdates(bot.last_message_received + 1);
}
lastTime = millis();
}
}
Telegram Commands
Once the ESP32 is connected, open your Telegram Bot and send:
| Command | Function |
|---|---|
/start | Display available commands |
/on | Turn LED ON |
/off | Turn LED OFF |
/status | Check LED status |
Example
Send:
/on
Bot response:
💡 LED is ON
Send:
/off
Bot response:
🔴 LED is OFF
Send:
/status
Bot response:
LED Status: ON
or:
LED Status: OFF
Understanding the Important Parts of the Code
Wi-Fi Connection
The ESP32 connects to the configured Wi-Fi network using:
WiFi.begin(ssid, password);
The program waits until the connection is established.
Telegram Secure Client
Telegram uses an encrypted HTTPS connection. The project creates a secure client:
WiFiClientSecure client;
Then the Telegram bot is initialized:
UniversalTelegramBot bot(BOT_TOKEN, client);
Checking Telegram Messages
The ESP32 checks for new Telegram messages every second:
const unsigned long interval = 1000;
Then:
bot.getUpdates(bot.last_message_received + 1);
retrieves new messages.
Why Chat ID Verification Is Important
The code checks:
if (chat_id != CHAT_ID)
This prevents another Telegram user from controlling your ESP32 through the bot.
If the Chat ID doesn’t match, the ESP32 responds:
Unauthorized user!
This is an important security feature for an IoT control project.
Security Improvements You Should Consider
The example uses:
client.setInsecure();
This is convenient for testing because certificate verification is disabled.
For a production IoT project, you should consider using proper TLS certificate verification rather than disabling certificate validation.
You should also:
- Keep your Bot Token private.
- Never upload Wi-Fi passwords to GitHub.
- Never publish your personal Chat ID unnecessarily.
- Restrict commands to authorized Chat IDs.
- Add authentication for multiple users.
- Avoid hard-coding sensitive credentials in public source code.
- Consider using environment/configuration storage for production devices.
Troubleshooting
1. ESP32 Does Not Connect to Wi-Fi
Check:
- Wi-Fi SSID
- Wi-Fi password
- 2.4 GHz Wi-Fi availability
- ESP32 power supply
- Router connectivity
ESP32 boards commonly use 2.4 GHz Wi-Fi, so ensure your network configuration is compatible.
2. Telegram Bot Does Not Respond
Check:
#define BOT_TOKEN "YOUR_BOT_TOKEN"
Make sure the Bot Token copied from BotFather is correct.
Also check the Serial Monitor.
Set:
115200 baud
You should see:
WiFi Connected!
IP Address: xxx.xxx.xxx.xxx
Telegram Bot Ready!
3. LED Does Not Turn ON
Check:
- LED polarity
- GPIO connection
- Resistor connection
- GND connection
- Correct GPIO number
The example uses:
#define LED_PIN 2
Your ESP32 board may have its built-in LED connected to a different GPIO.
4. “Unauthorized User” Message
This usually means your Chat ID doesn’t match:
#define CHAT_ID "YOUR_CHAT_ID"
Make sure you have entered the correct Chat ID.
Project Workflow
The complete system can be represented as:
       Smartphone
           |
           ↓
       Telegram App
           |
           ↓
     Telegram Bot API
           |
        Internet
           |
           ↓
         Wi-Fi
           |
           ↓
         ESP32
           |
           ↓
      GPIO 2 Output
           |
           ↓
          LED
This architecture can be expanded into a complete Telegram-based IoT automation system.
Applications of ESP32 Telegram Bot
This project can be used as the foundation for many IoT applications.
1. Home Automation
Control:
- Lights
- Fans
- Appliances
- Relays
- Smart plugs
using Telegram.
2. Industrial Automation
Telegram commands can be used for remote monitoring and basic control of machines and systems.
3. Security Systems
You can combine the ESP32 with:
- PIR sensors
- Magnetic door sensors
- Motion sensors
- Buzzers
- Relays
- Cameras
The ESP32 can send alerts to Telegram when an event occurs.
4. Smart Agriculture
Connect sensors such as:
- Soil moisture sensor
- Temperature sensor
- Humidity sensor
- Rain sensor
and send their readings to Telegram.
5. Remote Monitoring
The ESP32 can send:
Temperature: 28°C
Humidity: 65%
Pump: ON
Water Level: Normal
directly to Telegram.
How to Upgrade This Project
The LED is only the beginning.
You can replace the LED with a relay module and control a larger electrical load.
For example:
Telegram
   ↓
ESP32
   ↓
Relay Module
   ↓
Light/Fan/Appliance
You can also add commands such as:
/temperature
/humidity
/light
/fan_on
/fan_off
/pump_on
/pump_off
This turns the basic project into a Telegram-based IoT home automation system.
Adding Sensor Monitoring
For example, an ESP32 with a DHT11 sensor could send:
🌡 Temperature: 29.4°C
💧 Humidity: 61%
when the user sends:
/sensor
This creates a two-way IoT system:
Telegram → ESP32
for control, and
ESP32 → Telegram
for monitoring and alerts.
Advantages of Using Telegram for IoT
Telegram is useful for IoT projects because:
- It works on smartphones and computers.
- It supports bot-based automation.
- It provides remote communication over the internet.
- It can send text notifications.
- It can be used for remote device control.
- It does not require creating a dedicated mobile application for basic projects.
- Multiple IoT commands can be implemented through one bot.
ESP32 Telegram Bot Project Ideas
After completing the LED project, you can build:
- ESP32 Telegram Home Automation
- Telegram Controlled Fan
- Telegram Controlled Water Pump
- ESP32 Telegram Security Alarm
- Telegram Temperature Monitoring System
- Smart Agriculture Monitoring
- Telegram-Based Smart Door Lock
- ESP32 Telegram Motion Detection
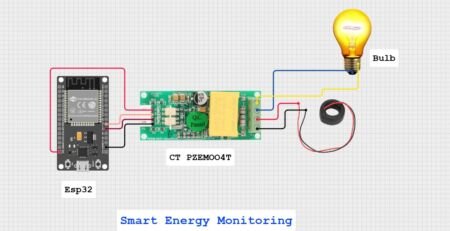
- IoT Energy Monitoring System
- Telegram-Based Industrial Monitoring System
Frequently Asked Questions
Can ESP32 work with Telegram?
Yes. ESP32 can communicate with Telegram through a Telegram Bot using an internet connection and libraries such as UniversalTelegramBot.
Can I control an LED from anywhere?
Yes, provided the ESP32 has internet access and can communicate with Telegram.
Do I need a Telegram mobile app?
You can use Telegram on a smartphone, desktop, or web interface.
Can I control multiple LEDs?
Yes. Assign each LED to a different GPIO and create separate commands such as:
/led1_on
/led1_off
/led2_on
/led2_off
Can I control a relay instead of an LED?
Yes. A relay module can be controlled using an ESP32 GPIO. For mains-voltage equipment, use appropriate isolation, enclosure, wiring, and qualified electrical practices.
Can I add sensors?
Yes. You can combine Telegram control with DHT11, DHT22, DS18B20, PIR, LDR, MQ-series sensors, ultrasonic sensors, and many other modules.
Is the Telegram Bot Token important?
Yes. Treat the Bot Token as a secret credential. Anyone who obtains it may be able to interact with your bot.
Conclusion
The ESP32 Telegram Bot LED Control project is an excellent beginner-friendly IoT project that demonstrates how a microcontroller can communicate with a cloud-based messaging platform.
With only an ESP32, LED, Wi-Fi connection, and Telegram Bot, you can create a remote-control system that responds to commands such as /on, /off, and /status.
More importantly, the same concept can be expanded into smart home automation, security systems, industrial monitoring, smart agriculture, remote sensor monitoring, and other IoT applications.
Once you understand the basic Telegram-to-ESP32 communication, you can replace the LED with relays, motors, pumps, lights, fans, and other devices and build much more advanced IoT systems.
Project Summary
Project Name: ESP32 Telegram Bot LED Control
Controller: ESP32
Communication: Wi-Fi + Telegram Bot
Programming Language: C/C++
IDE: Arduino IDE
Library: UniversalTelegramBot
Output: LED
Commands: /on, /off, /status, /start
Difficulty Level: Beginner
Project Type: IoT / Embedded Systems / Home Automation
This helps create a stronger internal-link structure and can improve the overall SEO of your WordPress website.
ESP32





Leave a Reply
You must be logged in to post a comment.