

15Dec
Button with ESP32
🧠 What is a Push Button?
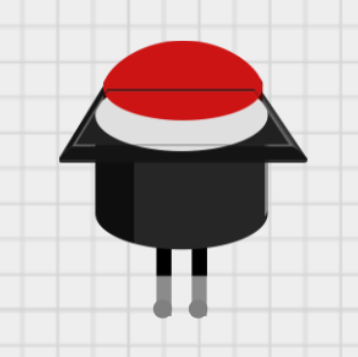
A push button is a simple mechanical switch that connects two points in a circuit when pressed.
- Normally Open (NO): Most common type — the circuit is open (OFF) when the button is not pressed.
- When pressed: The circuit closes, allowing current to flow.
🧾 Components Needed
- ESP32 board
- Push button
- 10kΩ resistor (for pull-down, optional if using internal pull-up)
- Jumper wires
- Breadboard
🔌 Wiring Push Button to ESP32
Option 1: Using Internal Pull-Up (Recommended)
| Button Pin | ESP32 |
|---|---|
| One leg | GND |
| Other leg | GPIO 14 (or any digital pin) |
No resistor needed — we’ll use the internal pull-up.
🧠 Working Logic (with pull-up):
- Button not pressed: Pin reads HIGH (connected internally to 3.3V)
- Button pressed: Pin reads LOW (connected to GND)
✅ Basic Code (Button with ESP32)
#define BUTTON_PIN 14 // Connect push button to GPIO14
void setup()
{
Serial.begin(115200);
pinMode(BUTTON_PIN, INPUT_PULLUP); // Use internal pull-up resistor
}
void loop()
{
int buttonState = digitalRead(BUTTON_PIN);
if (buttonState == LOW)
{
Serial.println("🔘 Button Pressed");
}
else
{
Serial.println("⭕ Button Released");
}
delay(200); // debounce delay }🟢 Optional: Control an LED with Button
#define BUTTON_PIN 14
#define LED_PIN 2 // Onboard LED (optional external)
void setup()
{
Serial.begin(115200);
pinMode(BUTTON_PIN, INPUT_PULLUP);
pinMode(LED_PIN, OUTPUT);
} void loop()
{
if (digitalRead(BUTTON_PIN) == LOW)
{
digitalWrite(LED_PIN, HIGH); // Turn on LED
}
else
{
digitalWrite(LED_PIN, LOW); // Turn off LED
}
}
USING Button.h Library
✅ Button library by J-M-L or others
These libraries are often named just Button.h, and are designed to simplify:
- Debouncing
- Single press
- Long press
- Multi-click detection
✅ Step-by-Step: Using Button.h Library with ESP32
📌 Note: Since
Button.his a generic name, I’ll assume you’re referring to a standard Arduino button library that providesbutton.isPressed()or similar methods. If you meant a different specific library, let me know!
📚 Step 1: Install the Library
- In Arduino IDE
- Go to Sketch > Include Library > Manage Libraries
- Search for
Button - You may see something like:
Buttonby J-M-LEasyButtonOneButton(also common and good)
Pick one based on features. Let’s continue with the simple “Button.h” by J-M-L version.
🧰 Hardware Setup
- Button one side → GND
- Button other side → GPIO 14 (or any digital input)
HOW TO OPERATE

/////////////////////////////////////////////////////////////////

#include "Button2.h"

/////////////////////////////////////////////////////////////////

#define BUTTON_PIN  12
#define LED 2
/////////////////////////////////////////////////////////////////

Button2 button;

/////////////////////////////////////////////////////////////////

void pressed(Button2& btn) {
    Serial.println("pressed");
    digitalWrite(LED, HIGH);
}
void released(Button2& btn) {
    Serial.print("released: ");
    digitalWrite(LED, LOW);
    Serial.println(btn.wasPressedFor());
}

void setup() {
    pinMode(LED, OUTPUT);
  Serial.begin(115200);
  delay(50);
  Serial.println("\n\nButton Demo");

  button.begin(BUTTON_PIN);

  Serial.println();

  button.setReleasedHandler(released);
  button.setPressedHandler(pressed);


}

/////////////////////////////////////////////////////////////////

void loop() {
  button.loop();
}

/////////////////////////////////////////////////////////////////


Leave a Reply
You must be logged in to post a comment.